
Thank you Barlen’s for sponsoring today’s recipe. As always, all opinions are my own.
This recipe for S’mores Popsicles are easy to make and everyone will be asking for seconds! Plus, no one will know their is a hidden healthy ingredient!
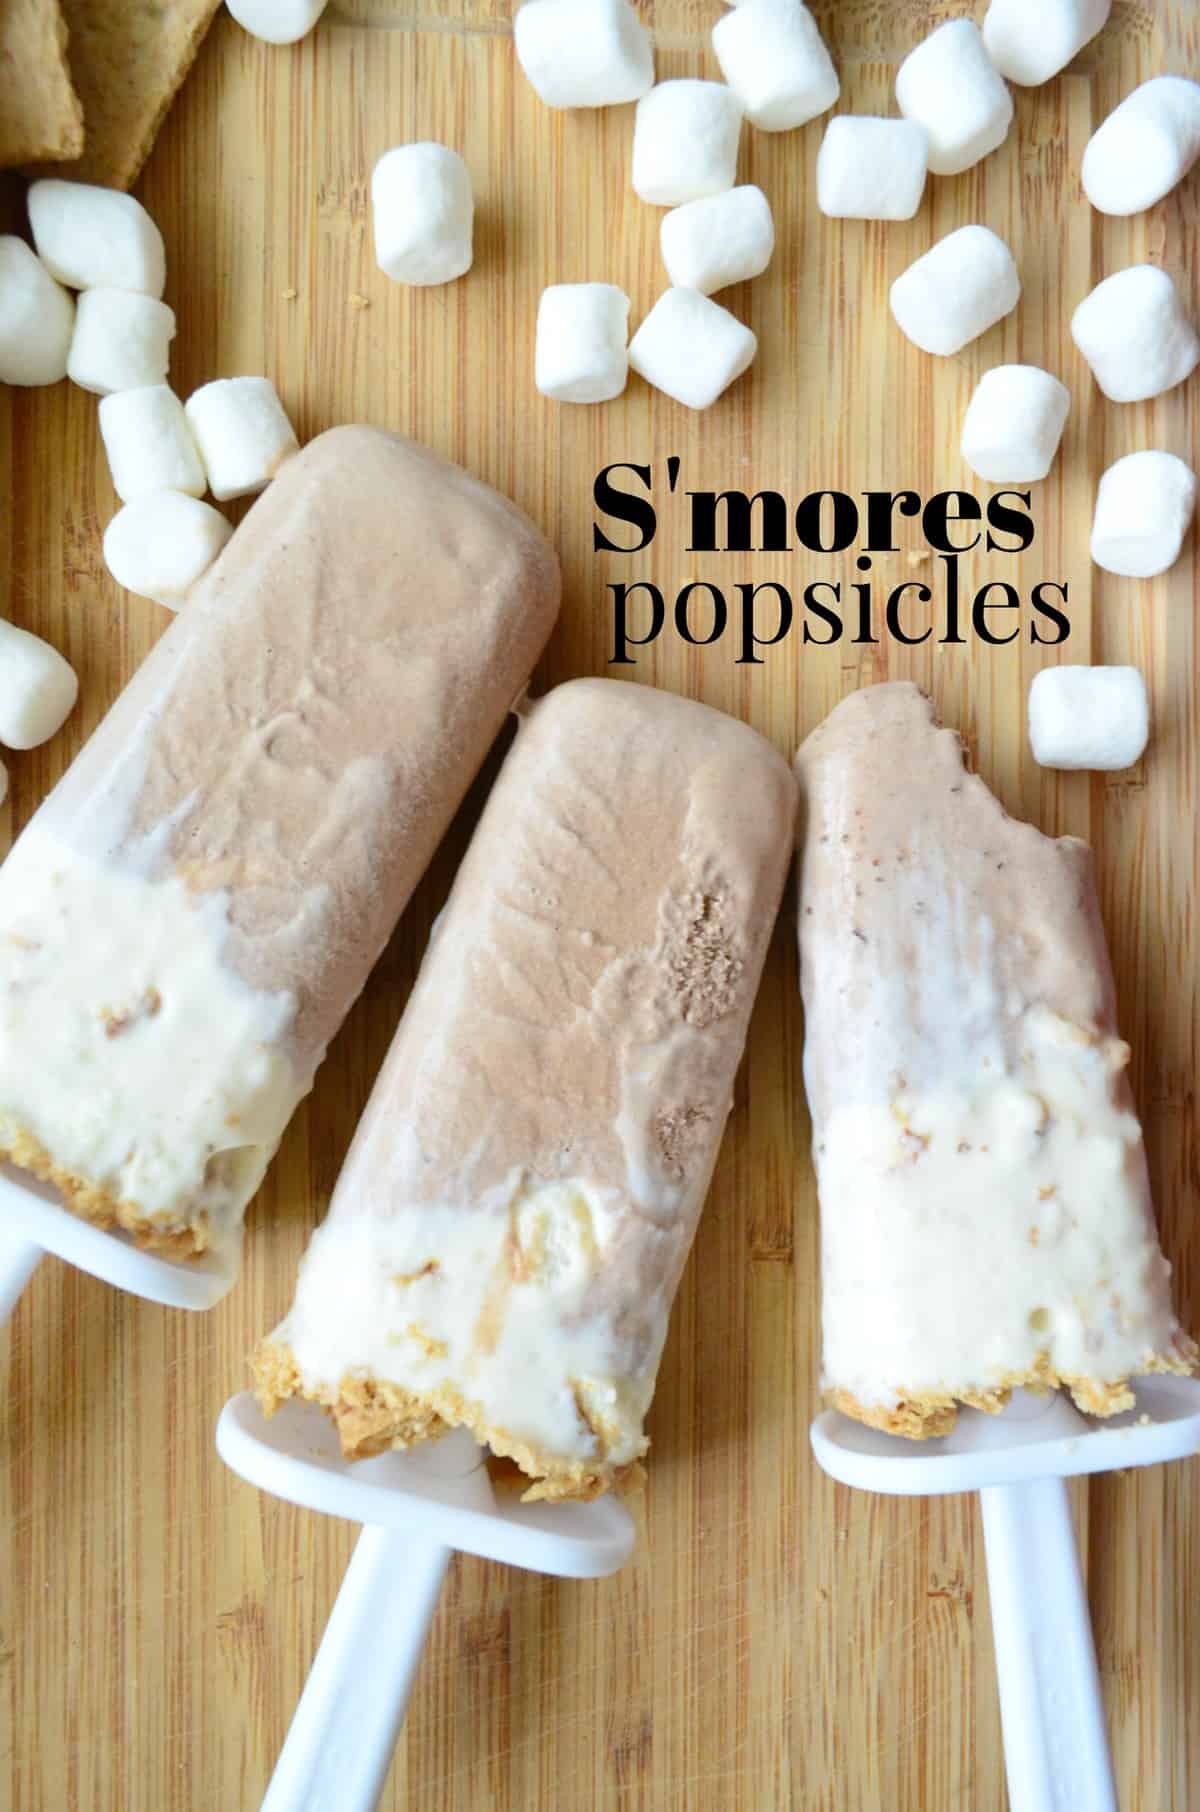
Today, is National S’mores Day. For once in my blogging life (well, maybe I’m exaggerating a little) I’m actually sharing a recipe that’s relevant to a “food holiday” today. I feel like I should earn a gold star. Since my friend’s at Barlean’s challenged me to come up with an Popsicle recipe using their
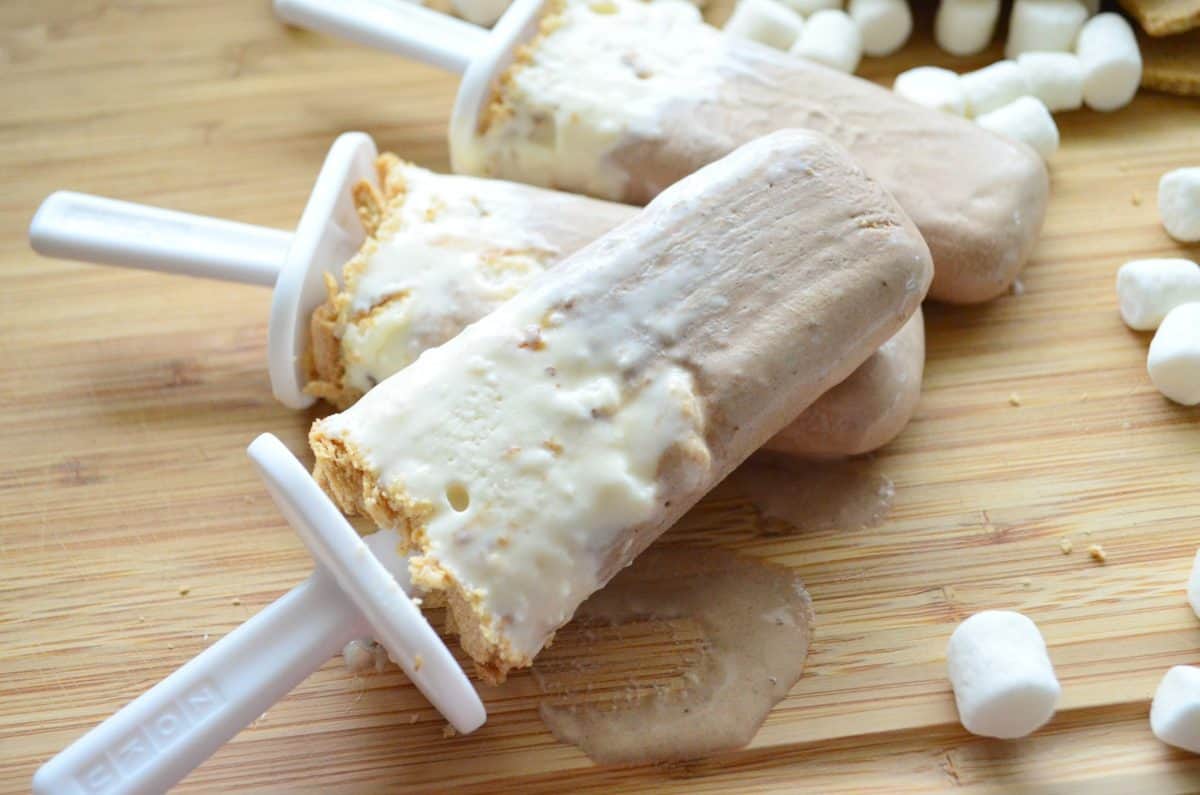
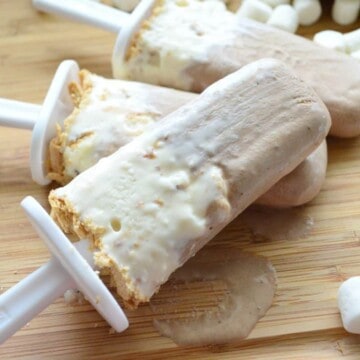
You’ll be happy to know that their is no stove top cooking involved for this layered ice pop recipe. I’m never a fan at the need to cook down ingredients and then cool–I want quick and fast which is why I’ve worked on testing this recipe over the course of the last month. I’ve also gotten this down to almost using every drop of batter for both layers. I used the Zoku Mod Pops as my ice pop mold. I will say–I’ve made a lot of ice pops over the years, and by far these are my favorite molds to use. I love it because each mold comes out individually so you can just run one individual pop under warm water for a few seconds and it comes out perfectly! *If your not using this popsicle mold and have an 8 count popsicle mold–you **might** be able to make 8. Their is a little leftover, but I haven’t tested with 8.
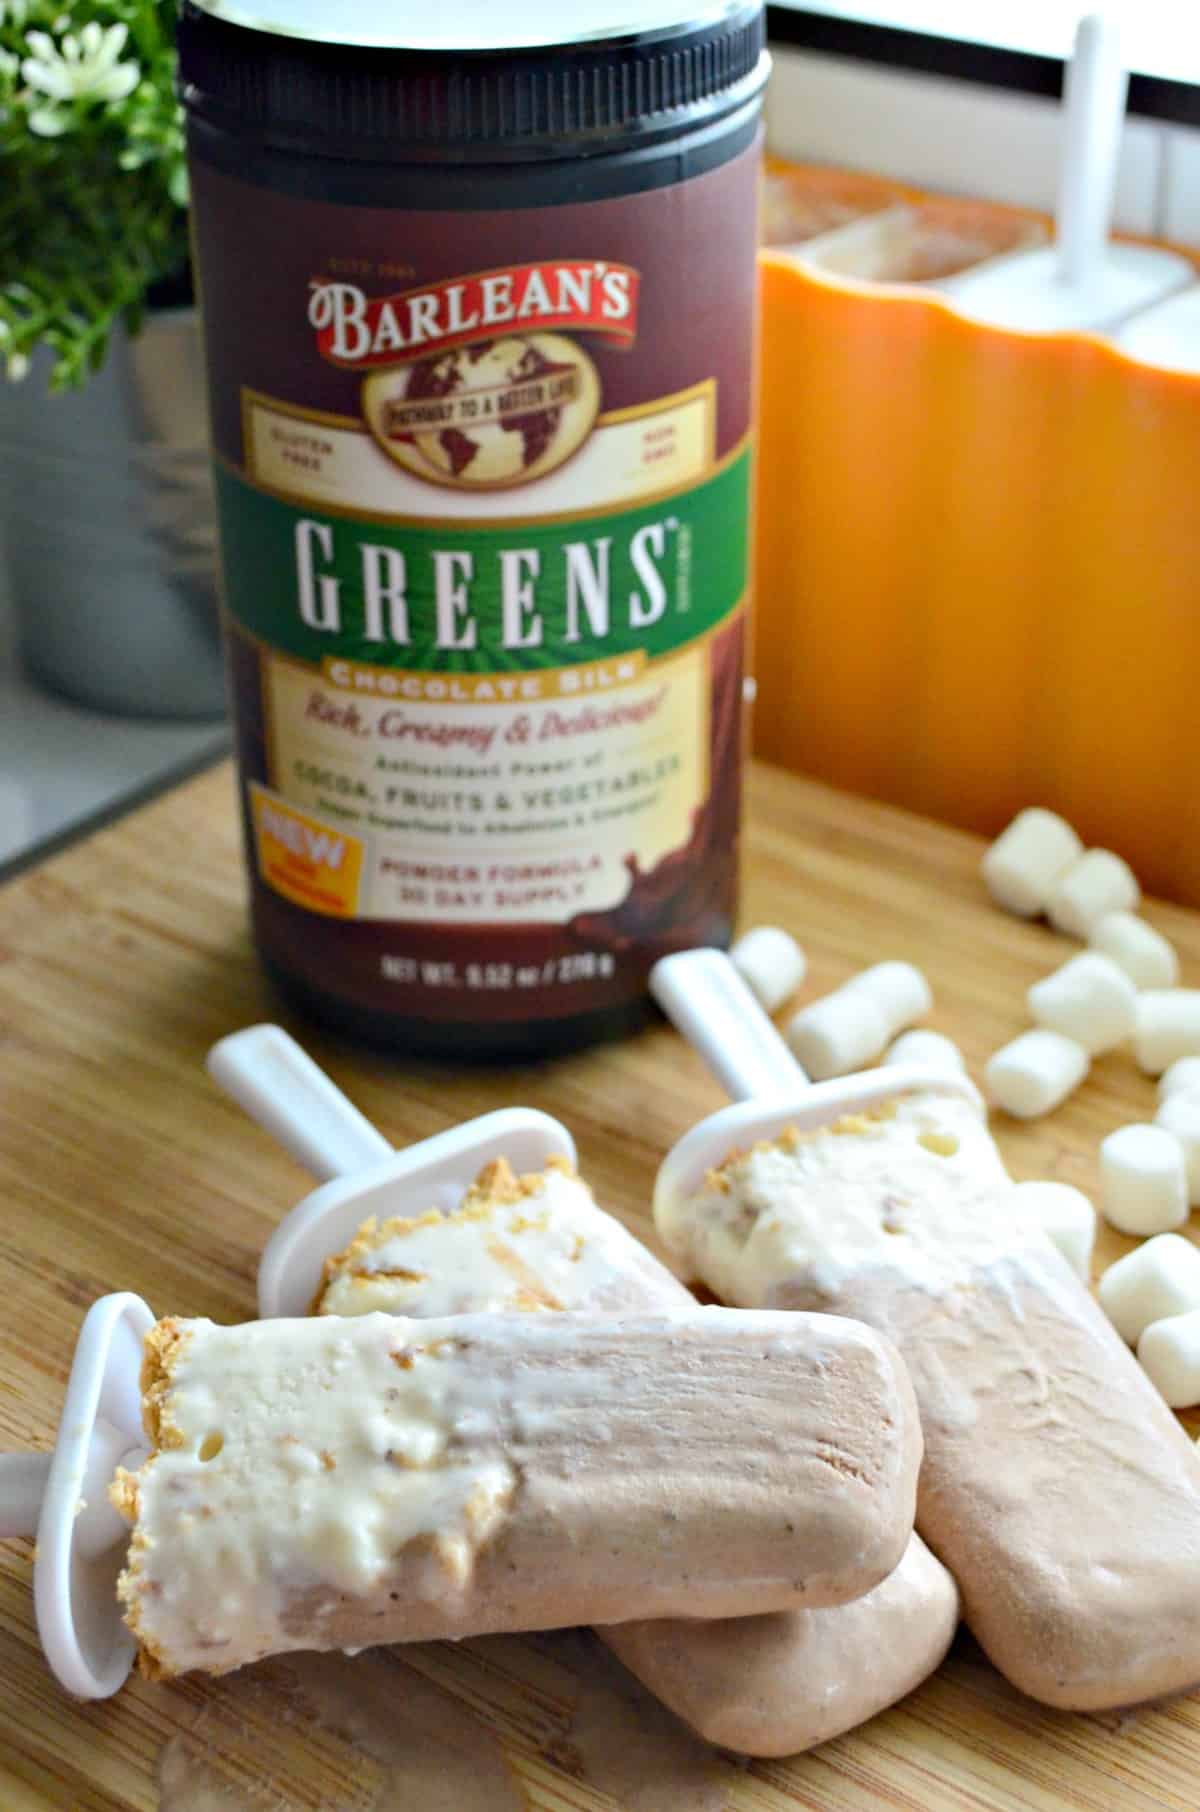
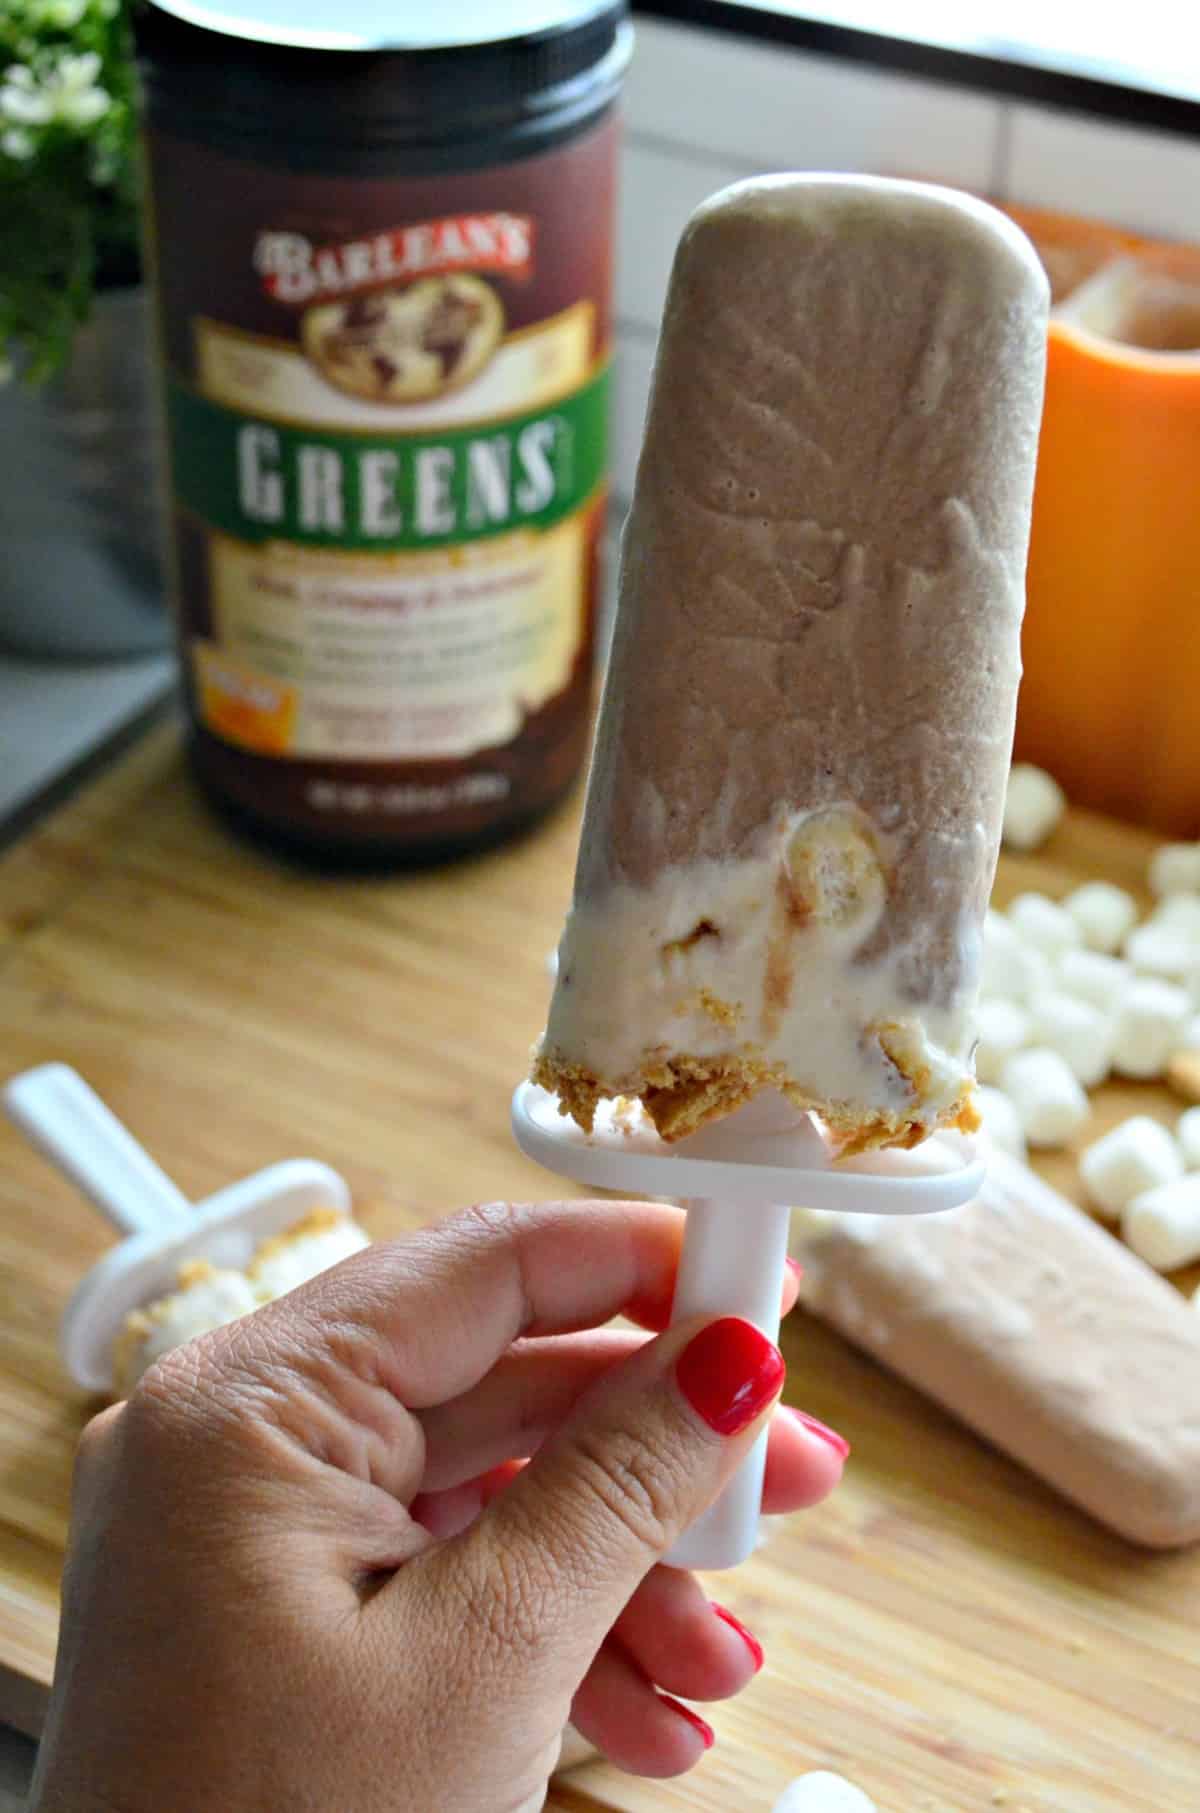
To make these ice pops I start by mixing together the chocolate layer first. As I mentioned above my chocolate layer has a secret ingredient that makes me not feel so bad about giving this decadent treat to my kids (or me eating it)! It has Barlean’s not familiar with the powder it’s a delicious superfood loaded powder with antioxidants from fair-trade cocoa and nutrients from more than a dozen fruits and veggies! Because it’s from Barlean’s it’s Non-GMO, Gluten Free, Soy Free, Dairy Free, Vegan and contains natural plant fiber from chicory and flaxseed. Once the chocolate mixture is made I like to pour it into a spouted measuring cup and then carefully pour the chocolate half way into each individual Popsicle mold. Then I stuck the mold container in the freezer. No need to put the sticks in yet. This just helped the chocolate firm up before pouring the toasted marshmallow batter on top.
I did a quick rinse of my stand mixer bowl and whisk then on to the toasted marshmallow layer. I’ll be honest this portion of the batter is even more amazing then the chocolate–if that could even be possible! I had debated about making these ice pops dairy free, but I’ll be honest since I’ve re-incorporated dairy back into my every day life I can’t live without it. These are loaded with dairy so if it bothers your stomach or you are trying to cut it out this might not be the recipe for you. Also, you can make these popsicles Gluten Free. Just make sure you read the label on your sweetened condensed milk that you pick up. I used Eagle Brand and they are verified Gluten Free! You will need to use a Gluten Free graham cracker or just omit it. Either way works!
Now–on a very important note: I tested this recipe with large and small marshmallows. The small marshmallows worked the best because the molds are not that large. If you only have large marshmallows on hand I would chop them in small pieces before broiling. Do note, I repeat DO NOT step away from the broiler when you are broiling the marshmallows. I literally leaned down and watched through the window in my oven (with a stop watch) to see how long it would take to broil the marshmallows to a perfect golden color. It was roughly 30 seconds on high. Every oven is different. Just keep your pot holder in hand, oven light on, and watch them like you would a newborn baby. I did this step while I was mixing the marshmallow batter. They take less than a minute to cool-off once you take them out of the oven and I’ll be honest that I found if they were a little warm they broke up better in the batter. You will want to change the attachment on your stand mixer from a whisk to a fitted paddle or else all the marshmallows will clump in the middle of the balloon whisk. Trust me–I learned my lesson the first time around! Pour in this layer and then it’s time to take a graham cracker and start crumbling! I only used 1 graham cracker that I finely broke up with my hands over the top of the mold. You can use more if you want but I didn’t find it necessary!
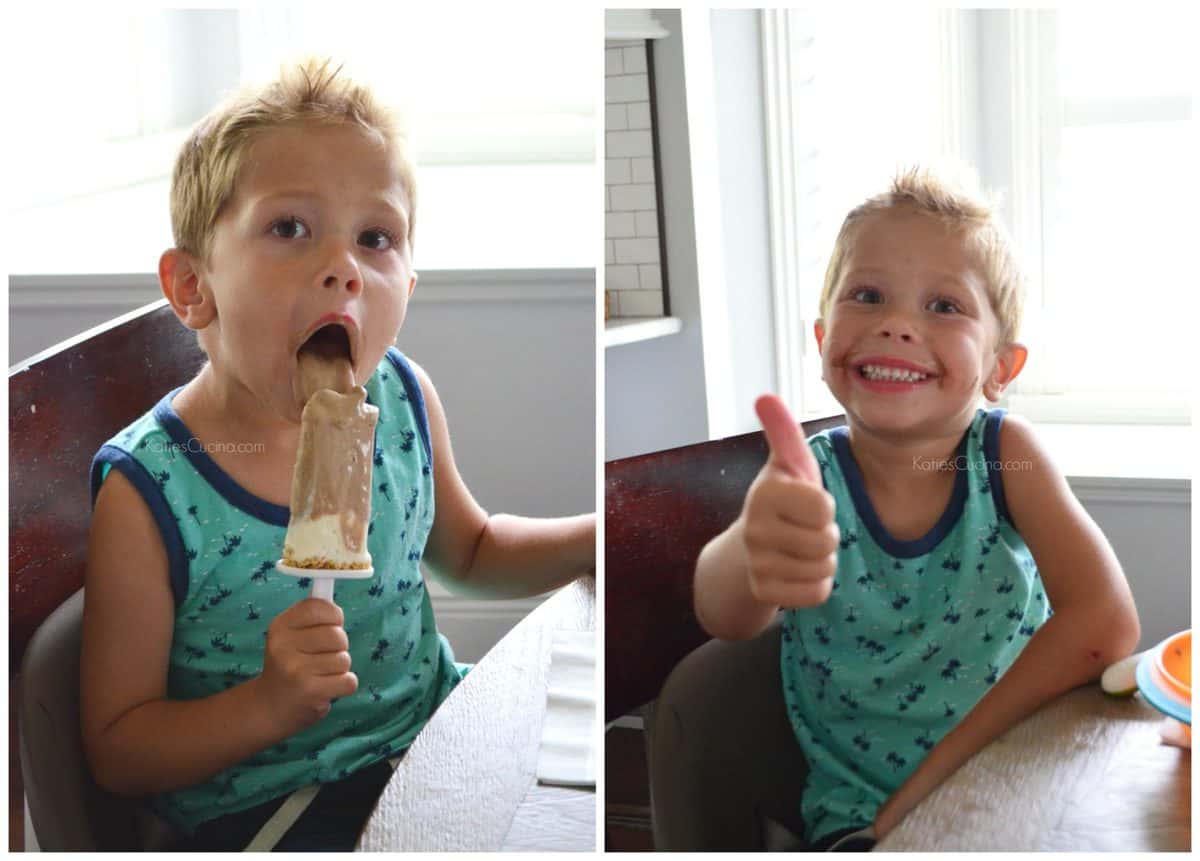
As you can tell from the photo’s above my son approved of these popsicles! Little did he know that the chocolate was full of healthy greens for him! If your looking for a fun summertime treat that has a spin on the classic I hope you’ll give my recipe for S’mores Popsicles a try!
Shop to make this post:
S’mores Popsicles
Ingredients
For the Chocolate Layer:
- ½ cup heavy whipping cream
- 1 tablespoon powdered sugar
- 1 scoop Barlean's Chocolate Silk Greens™ Powder
For the Toasted Marshmallow Layer:
- 2 cups mini marshmallows
- ½ cup whipping cream
- ⅓ cup sweetened condensed milk
- 1-2 graham crackers crumbled
Instructions
To make the chocolate layer:
- using a stand mixer fitted with a whisk attachment, beat the heavy whipping cream, powdered sugar, and Barlean’s Chocolate Silk Greens™ Powder for 2 minutes until the mixture begins to get thick. Transfer to a measuring cup with a spout. Then pour the chocolate mixture halfway in a 6-pop popsicle mold. Place in the freezer.
For the toasted marshmallow layer:
- Preheat the broiler on high. Line a baking sheet with aluminum foil and spray with non-stick spray. Set to the side.
- While the oven pre-heats you’ll make the base for the toasted marshmallow layer. Rinse the mixing bowl and whisk and place back on the stand mixer. Add the heavy whipping cream and condensed milk. Beat on high for one minute. While the batter mixes Lay the mini marshmallows out on the pan and toast for about 30 seconds until golden brown but not burnt. Remove from the oven and set to the side.
- Stop the mixer, remove the whisk attachment and insert the paddle attachment. Add in the toasted marshmallows. Mix on medium for 30 seconds until incorporated and not lumpy. Pour the batter into a spouted measuring cup.
- Remove the popsicle mold from the freezer, and pour the toasted marshmallow batter evenly among the popsicle mold until almost to the top. Next, take the graham cracker and beging crushing it with your fingers and sprinkling on top of each popsicle mold. Once you can no longer see any marshmallow batter place the sticks in the molds. Freeze for 8-10 hours. Run the molds under warm water for 10-15 seconds until each popsicle can easily be pulled out of the mold. Eat immediately and enjoy!
Kayle (The Cooking Actress)
YUMMM. I lovelovelove s’mores so these popsicles are THE BEST
Katie
Yesss they are so good! And perfect way to sneak in veggies for the kiddos!