

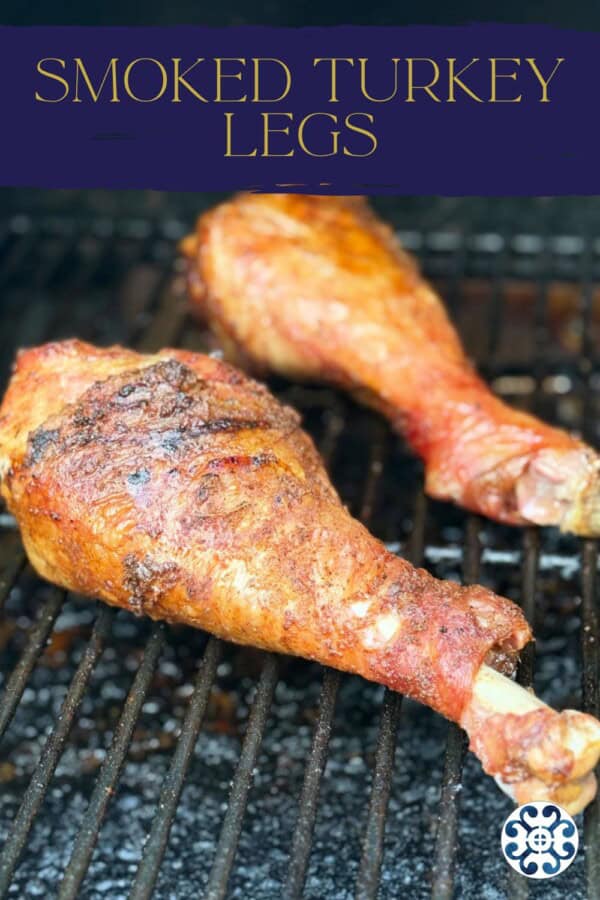
Juicy, smoky, fall-off-the-bone tender, these Traeger Smoked Turkey Legs are a backyard BBQ favorite that taste just like the ones you get at theme parks and fairs—only better!
There’s nothing quite like biting into a big, juicy turkey leg that’s been slow-smoked until tender. Whether you’re reminiscing about theme park eats, the county fair, or looking for a fun and flavorful way to enjoy turkey outside of Thanksgiving, smoked turkey legs are the way to go.
When I made these on our Traeger pellet grill for the first time, my husband and son absolutely devoured them! They couldn’t get over how flavorful and juicy the meat was — and even said they were better than the giant turkey legs we’ve had at the theme parks. Needless to say, this recipe quickly became a family favorite and a go-to for weekend grilling.
The best part? They’re surprisingly easy to make at home. With just a simple seasoning blend and a few hours of low-and-slow smoking, you’ll end up with turkey legs that are smoky, savory, and absolutely irresistible.
Why this Recipe Works
Smoky & Flavorful – The Traeger infuses the turkey legs with just the right amount of wood-fired flavor without you having to do too much during the cooking process.
Tender & Juicy – Low and slow cooking ensures the meat stays juicy while the skin gets perfectly smoky. When you brine the turkey legs prior to cooking — you are guaranteed to have juicy not dry turkey!
Better Than Theme Parks – Skip the long lines and hefty price tag—you can make these right in your own backyard for under $10 per leg (depending on the price you can find them at the store).
Ingredients
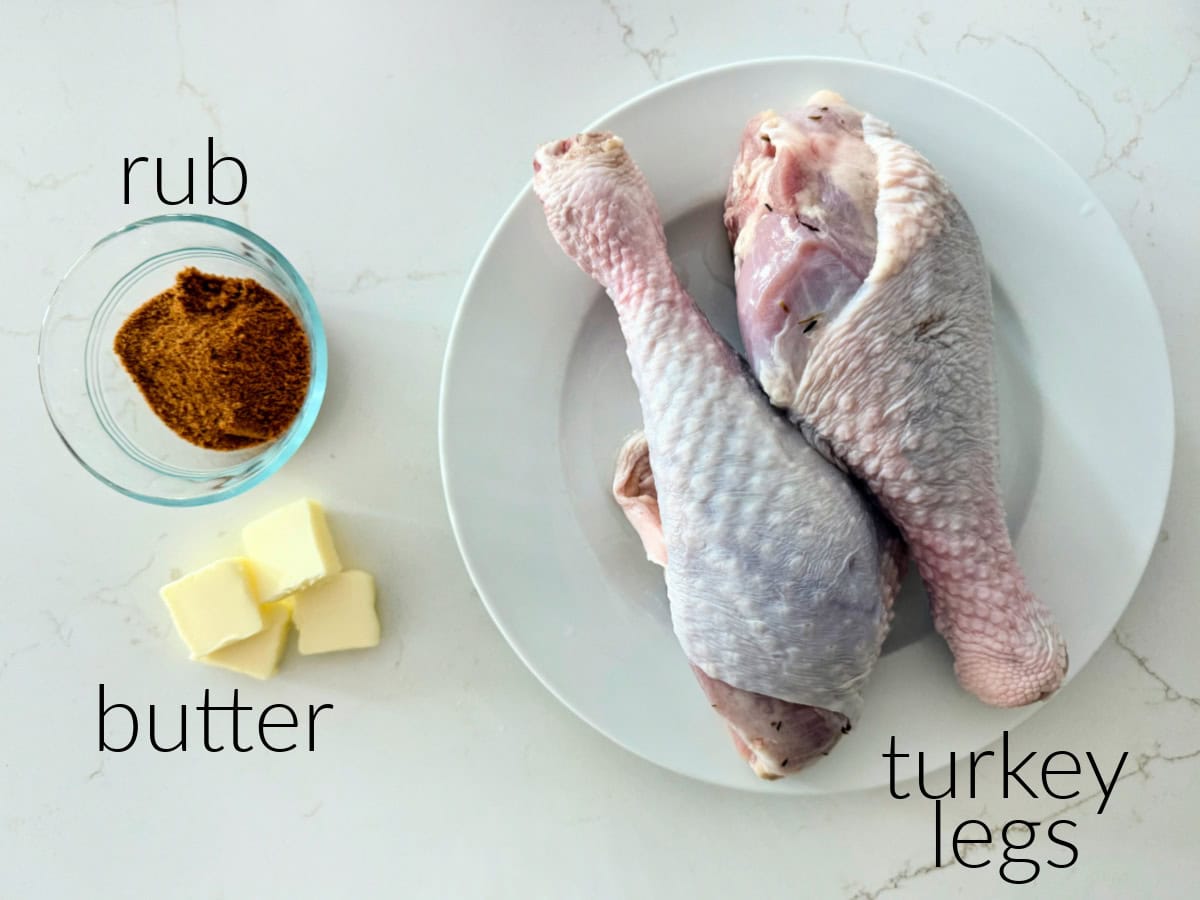
- Turkey legs – Look for drumsticks about 1–1.5 lbs each for the best balance of flavor and tenderness.
- Butter – I place a few pats of butter underneath the skin to help keep the meat moist and flavorful.
- Dry rub seasoning – You can make your own rub or use your favorite store bought. For this recipe, I like to use Kinder’s Woodfire Garlic.
Directions
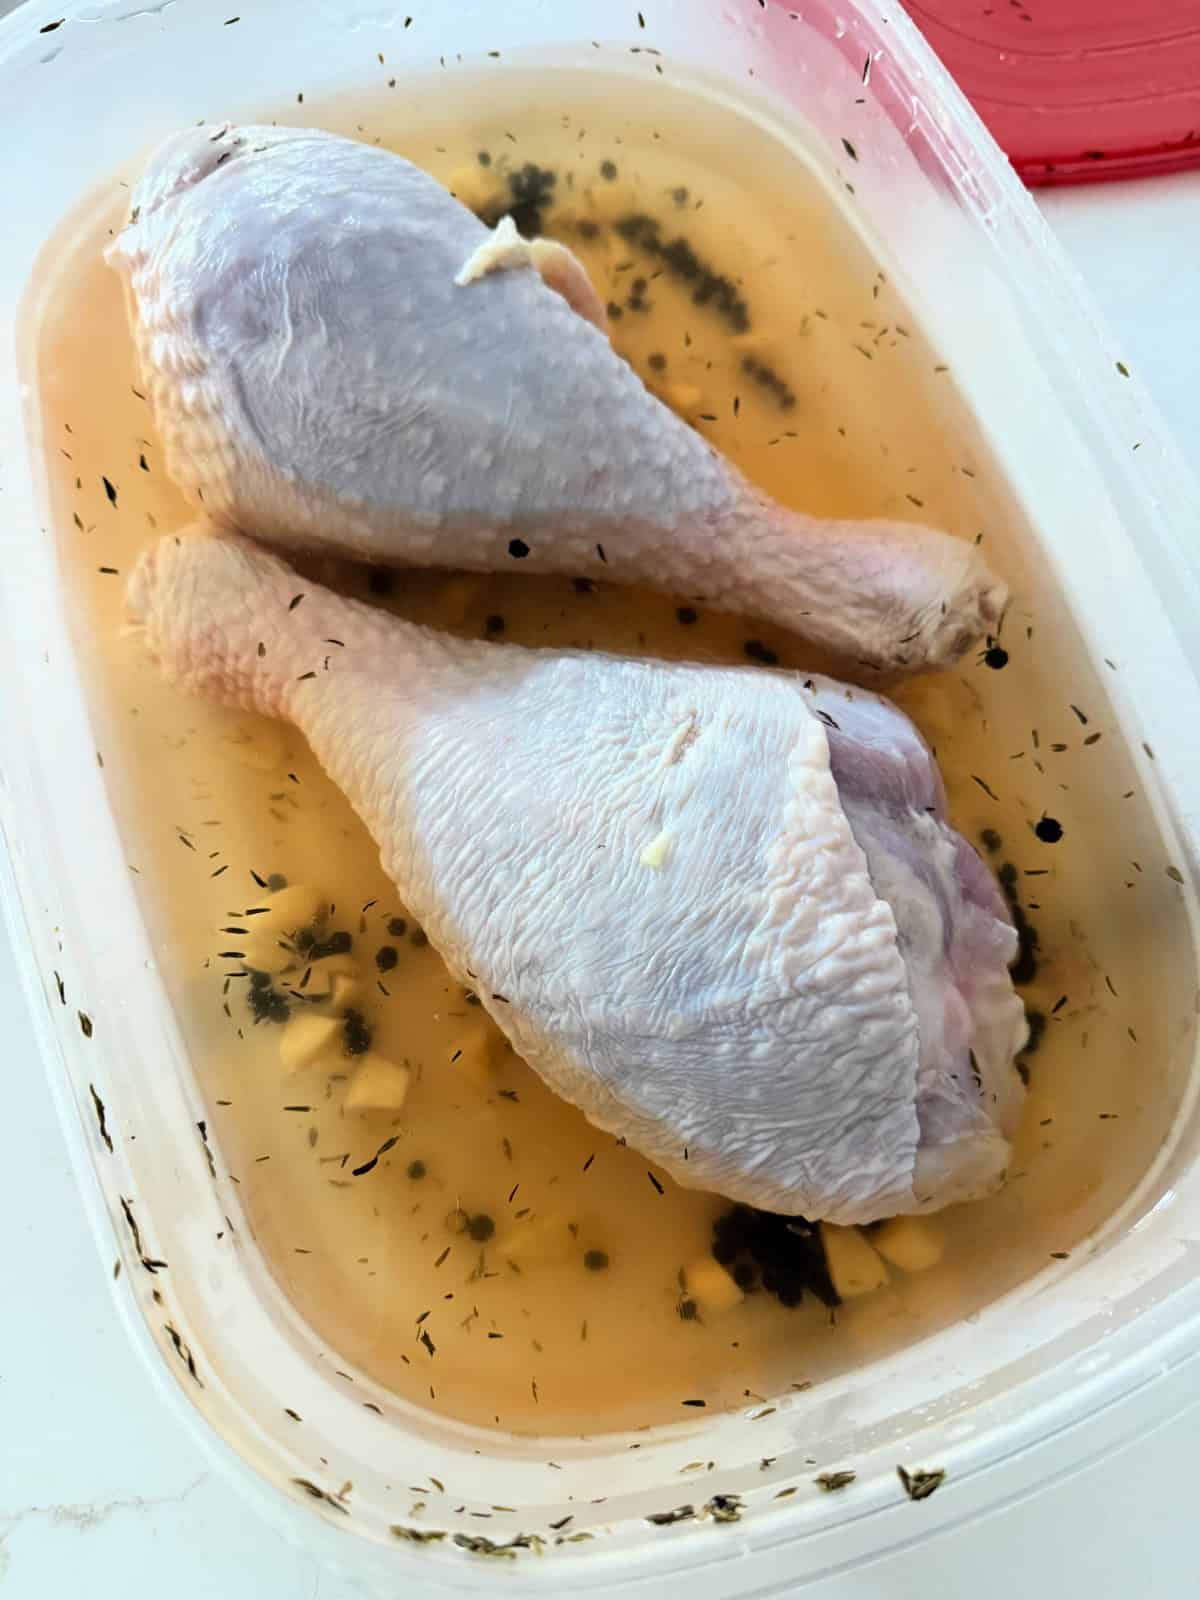
Brine the turkey legs – At least 12 hours before smoking, combine the brine ingredients in a large pot. Stir until the salt dissolves, then submerge the turkey legs in the brine. Cover and refrigerate for at least 12 hours or up to 24 hours prior to smoking.
Prep the Traeger – When ready to cook, preheat your pellet grill to 225 degrees Fahrenheit.
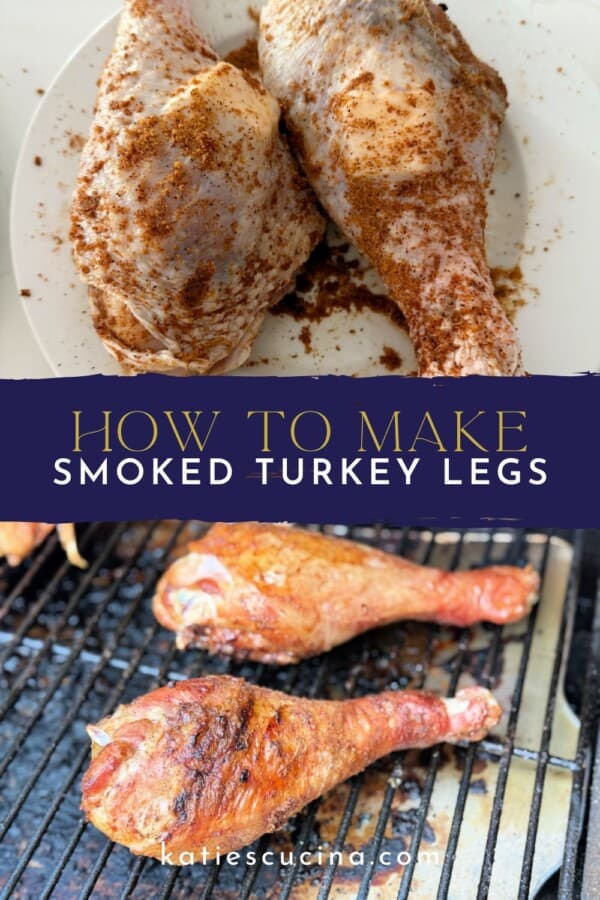
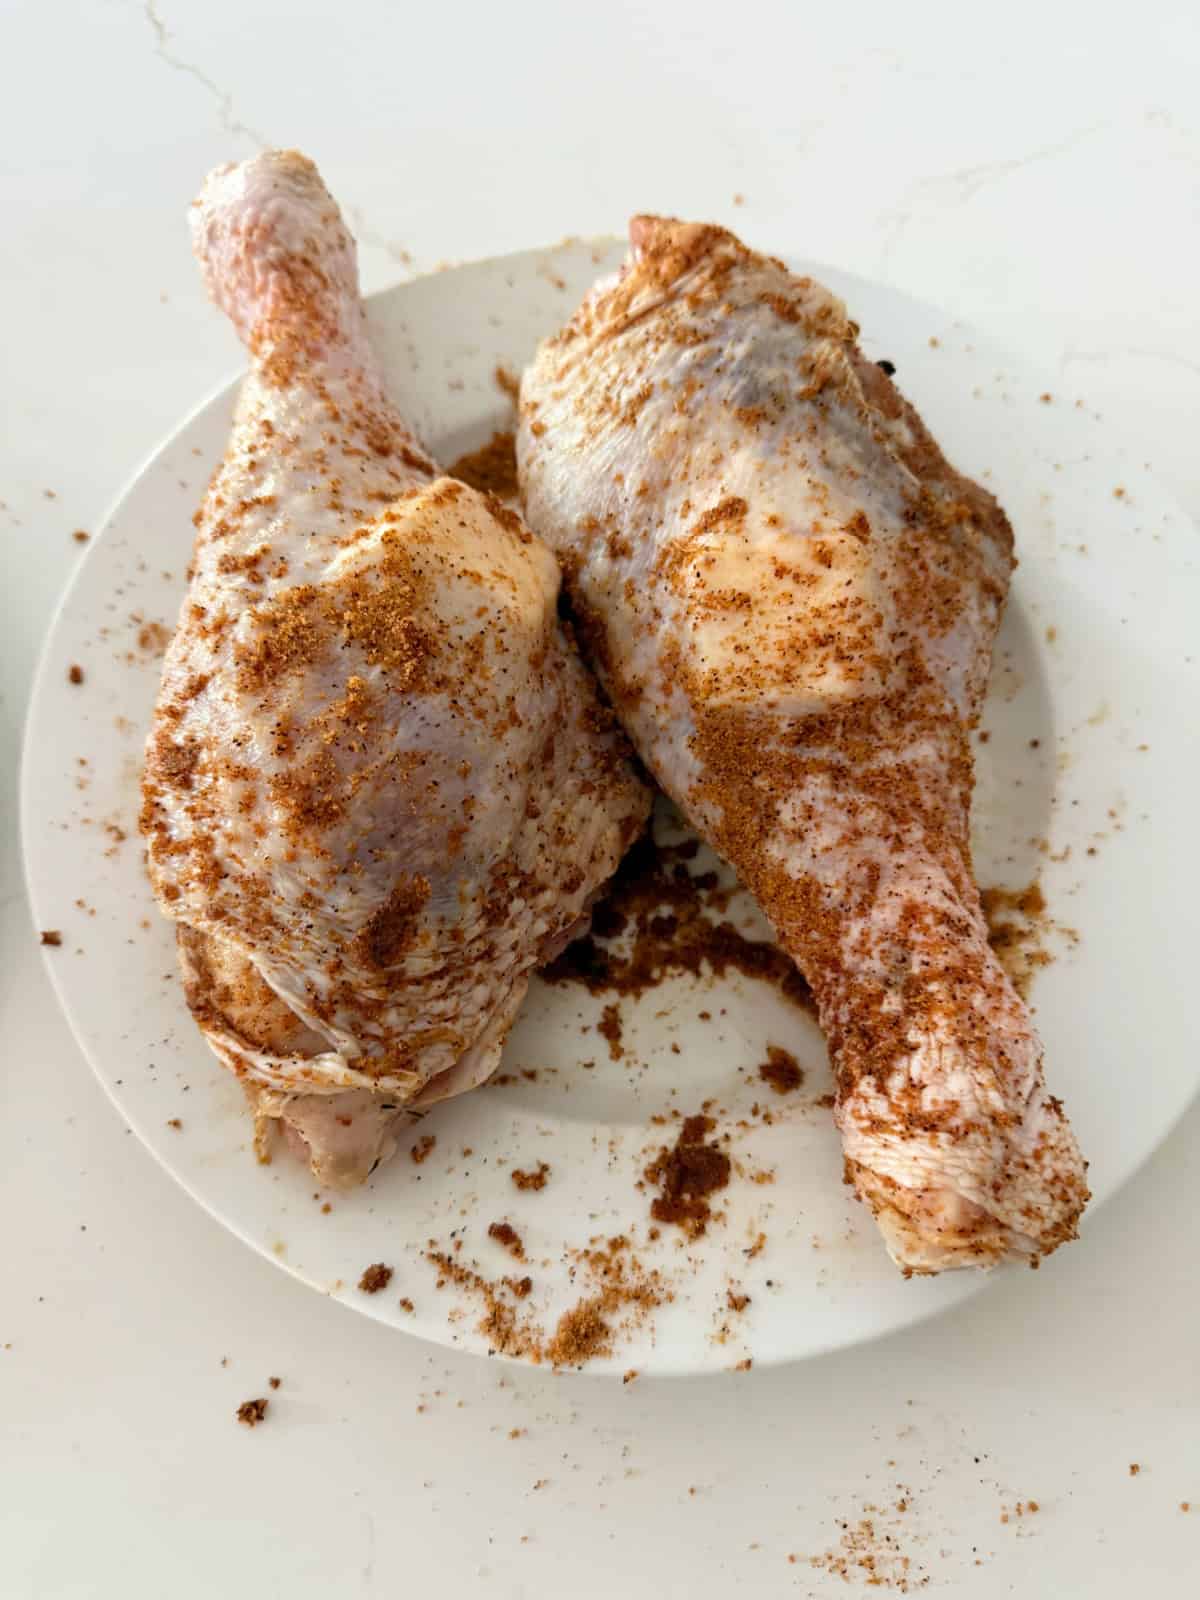
Season the turkey legs – Remove the turkey legs from the brine, rinse with cool water, and pat dry with paper towels. Coat the turkey legs generously with your favorite seasoning blend. Then peel back a little bit of the turkey skin and place a pat of butter underneath the skin. Repeat until all butter is used.

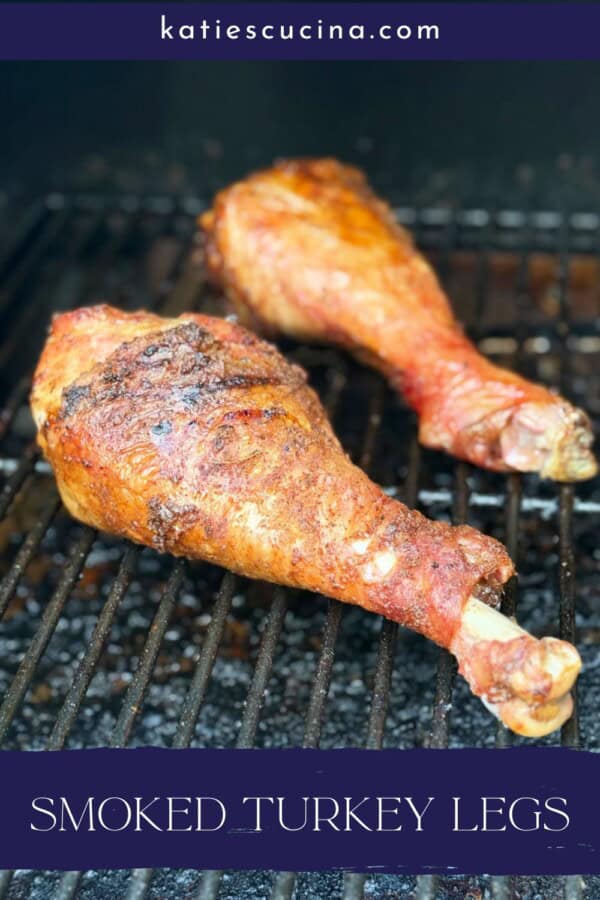
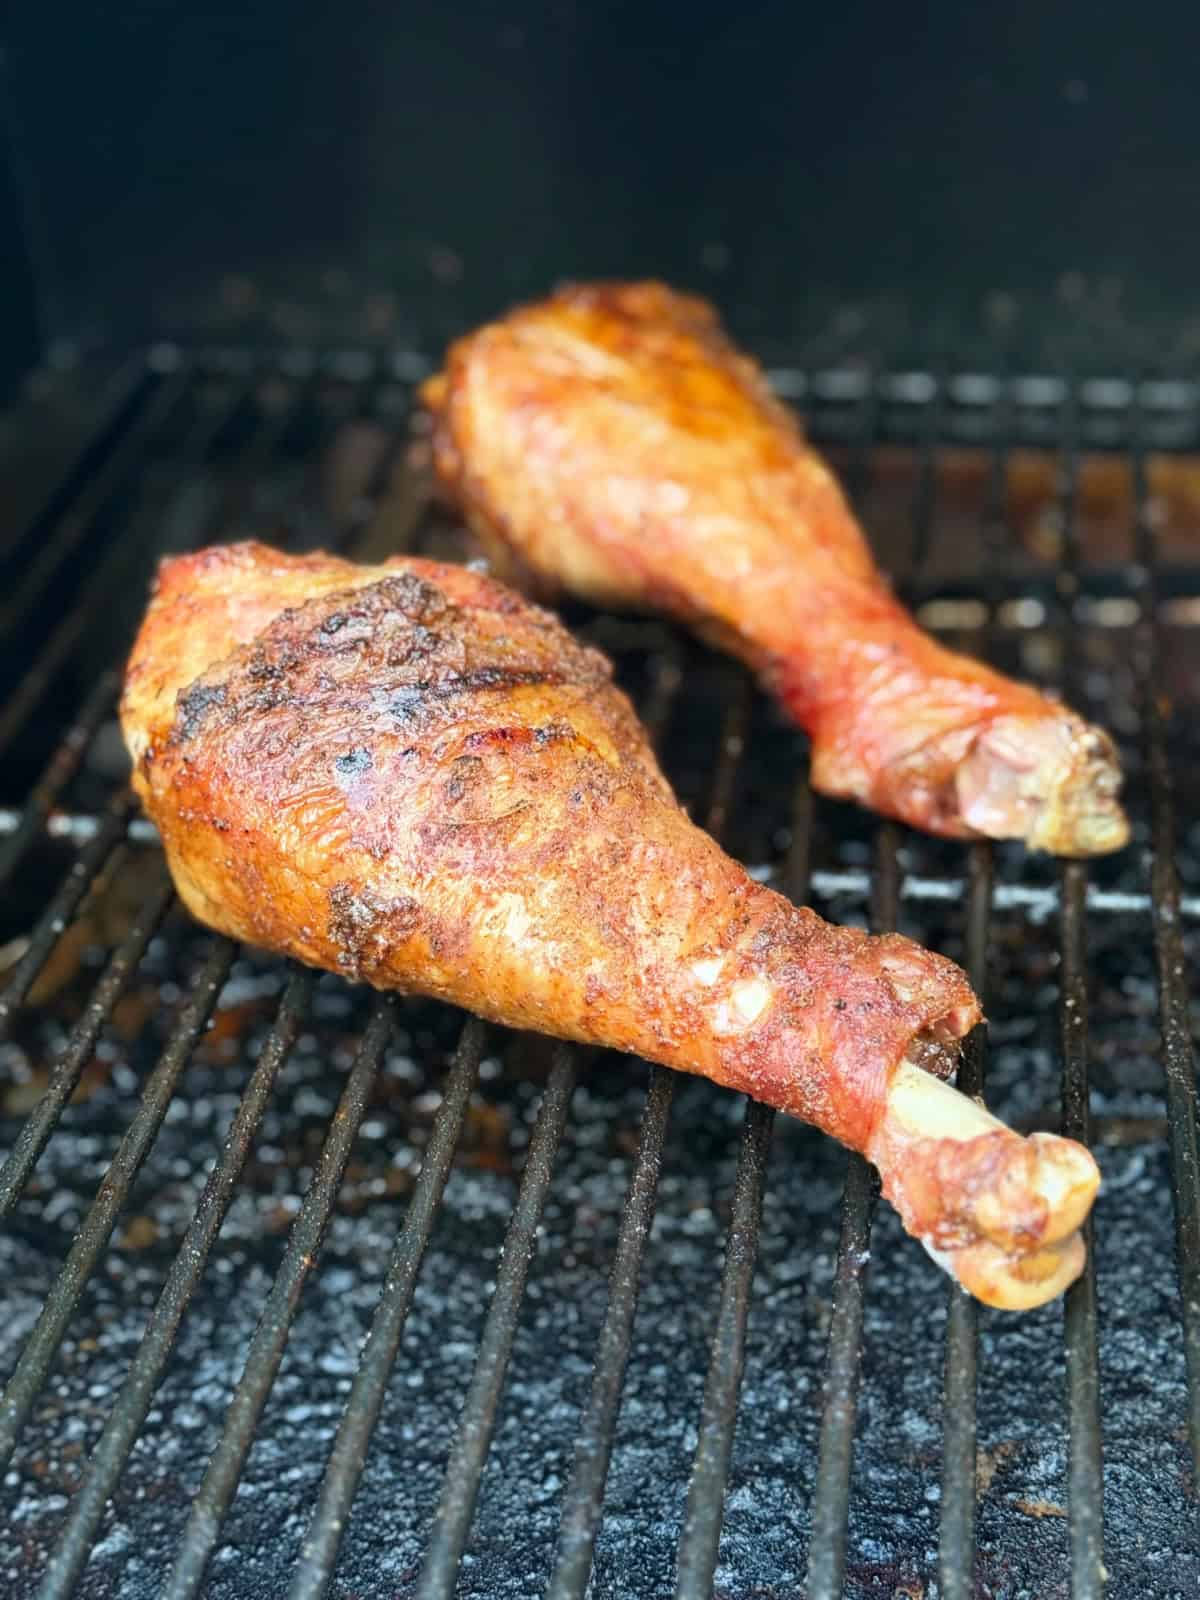
Smoke low and slow – Place the turkey legs directly on the grill grates. Smoke at 225 degrees Fahrenheit for about 2 hours to let the smoky flavor develop.
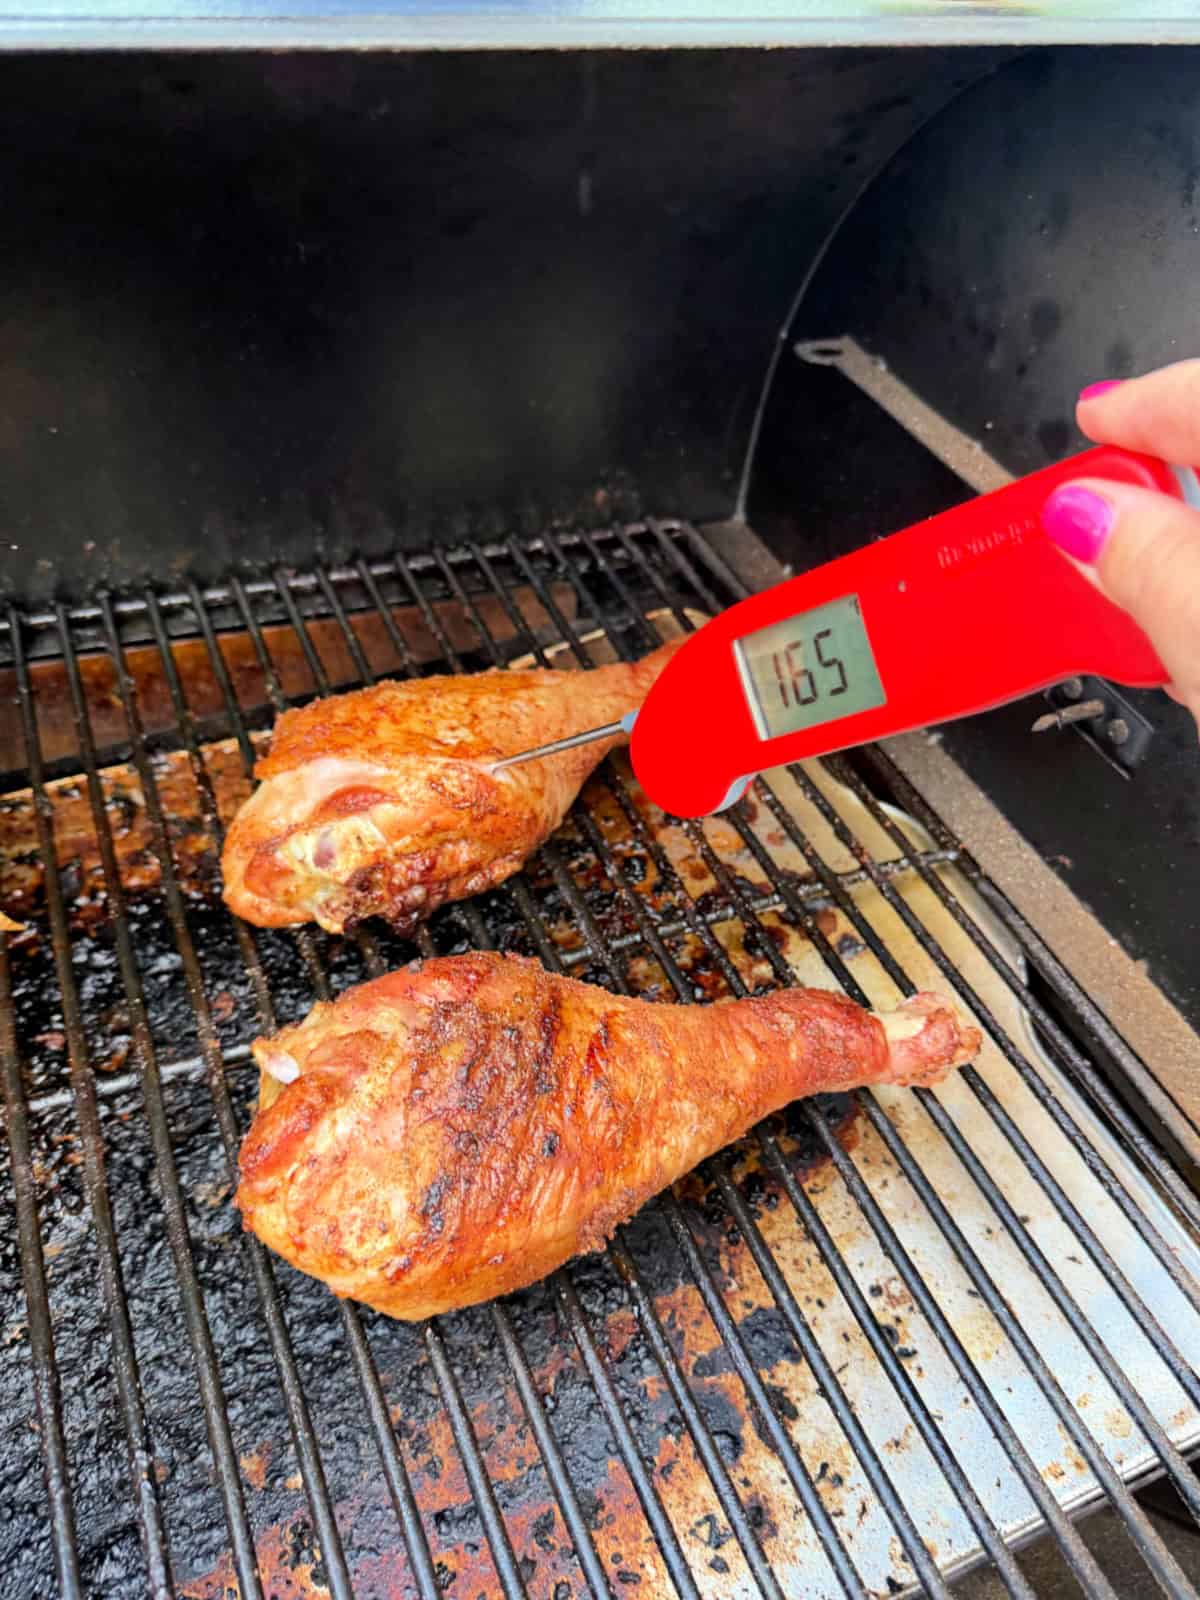
Increase the heat – Raise the temperature to 350 degrees Fahrenheit and continue smoking for 30–45 minutes, or until the internal temperature reaches 165 degrees Fahrenheit in the thickest part of the leg.
Rest & serve – Let the turkey legs rest for 10 minutes before serving to lock in all those juices.
FAQs
Yes! Brining makes a huge difference in flavor and juiciness, especially when smoking. It’s worth the extra step if you want to achieve the theme park juicy turkey legs we all know and love.
I love using hickory as it tends to give a strong smoky flavor, while apple and cherry offer a sweeter, milder smoke.
Yes — reheat them wrapped in foil at 300 degrees Fahrenheit. until warmed through, or warm them right on the Traeger at low heat around 250 degrees Fahrenheit. (and wrapping them with foil).
Recipes Tips & Tricks
Here are a few of my favorite recipe tips and tricks when making smoked turkey legs.
- Thermometer – Always use a meat thermometer to ensure perfect doneness. When cooking poultry you need to make sure the internal temperature reaches at least 165 degrees Fahrenheit. My Traeger has the thermometer probe that sends an alert right to my phone! Any instant read thermometer will work, too. I often double check with one.
- Brine – To ensure you have moist turkey legs it’s so important to not skip this step. I like to brine overnight for the best flavor and texture.
- Shiny Finish – Want that theme park-style glossy finish? Brush the legs with melted butter during the last 10 minutes of smoking.
- Let Rest – Make sure to let the meat rest for at least 10 minutes before digging in. This will ensure that the juices distribute properly.
If you make this recipe, I would be honored and love for you to take the time to leave a ⭐ star rating and comment! I spend hours developing and testing these recipes, and always love to hear feedback and user experience!
Don’t forget to FOLLOW ME on Facebook, Pinterest, and Instagram, and subscribe to my email list!

Smoked Turkey Legs
Equipment
- Measuring Spoons
- Tongs
- Traeger Pellet Grill
Ingredients
- 3-4 pounds Turkey Legs
- 2 tablespoons Rub of Choice
- 2 tablespoons Salted Butter
Instructions
- Brine the turkey legs at least 12 hours before smoking, combine the brine ingredients in a large pot. Stir until the salt dissolves, then submerge the turkey legs in the brine. Cover and refrigerate for at least 12 hours or up to 24 hours prior to smoking.
- Once you are ready to cook, preheat your pellet grill to 225 degrees Fahrenheit.
- Remove the turkey legs from the brine, rinse with fresh water, and pat dry with paper towels. Coat the turkey legs generously with your favorite seasoning blend. Then peel back a little bit of the turkey skin and place a pat of butter underneath the skin. Repeat until all butter is used.
- Place the turkey legs directly on the grill grates. Smoke at 225 degrees Fahrenheit for about 2 hours to let the smoky flavor develop. Increase the temperature to 350 degrees Fahrenheit after 2 hours. Continue cooking for 30–45 minutes, or until the internal temperature reaches 165 degrees Fahrenheit in the thickest part of the leg.
- Let the turkey legs rest for 10 minutes before serving to lock in all those juices.
Notes
- Thermometer – Always use a meat thermometer to ensure perfect doneness. When cooking poultry you need to make sure the internal temperature reaches at least 165 degrees Fahrenheit. My Traeger has the thermometer probe that sends an alert right to my phone! I always check with an instant read as well just to make sure the poultry is completely cooked through,.
- Brine – To ensure you have moist turkey legs it’s very important to not skip this step. I like to brine overnight for the best flavor and texture.
- Shiny Finish – Want that theme park-style glossy finish? Brush the legs with melted butter during the last 10 minutes of smoking.
- Let Rest – As excited or hungry as you may be to dig in–it is very important to let the meat rest for at least 10 minutes before digging in. This will ensure that the juices distribute properly.
Nutrition
reader favorites
★★★★★
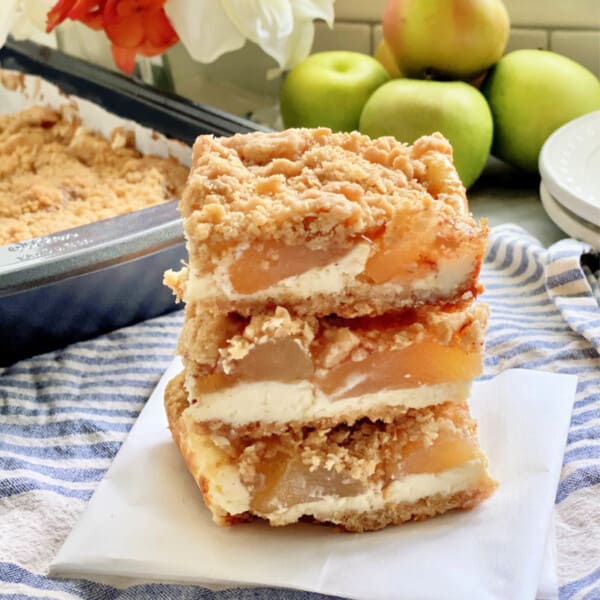
Apple Pie Cinnamon Bars
“I made these for a family gathering and everyone asked for the recipe!”
-Sheila

★★★★★
Oreo Ice Cream
“I don’t have an ice cream maker and this was so easy to make – obsessed!”
-Kathy


Did you make this recipe? Let me know!