


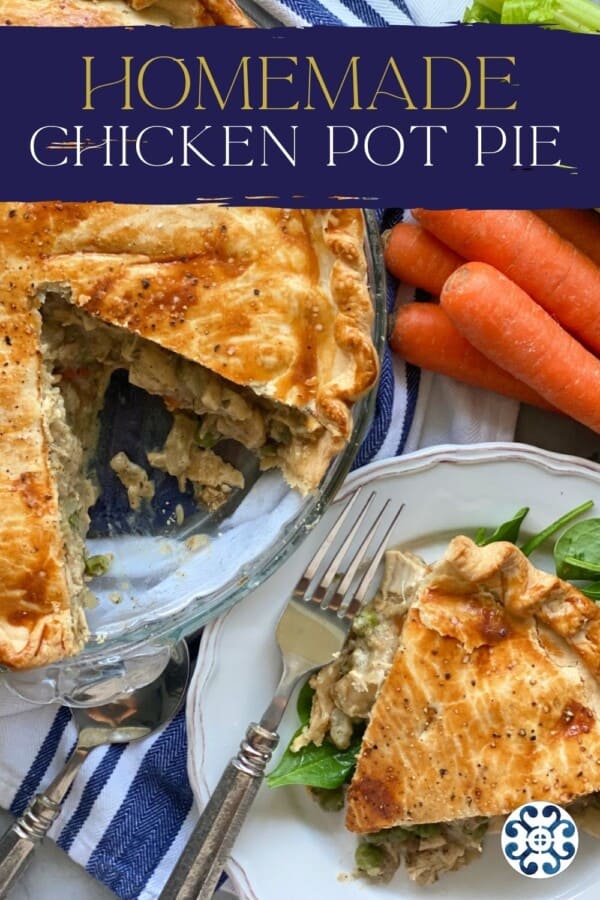
Whip up this creamy chicken pot pie in under an hour—made with fresh ingredients, wrapped in a golden, flaky crust, and guaranteed to be a family favorite.
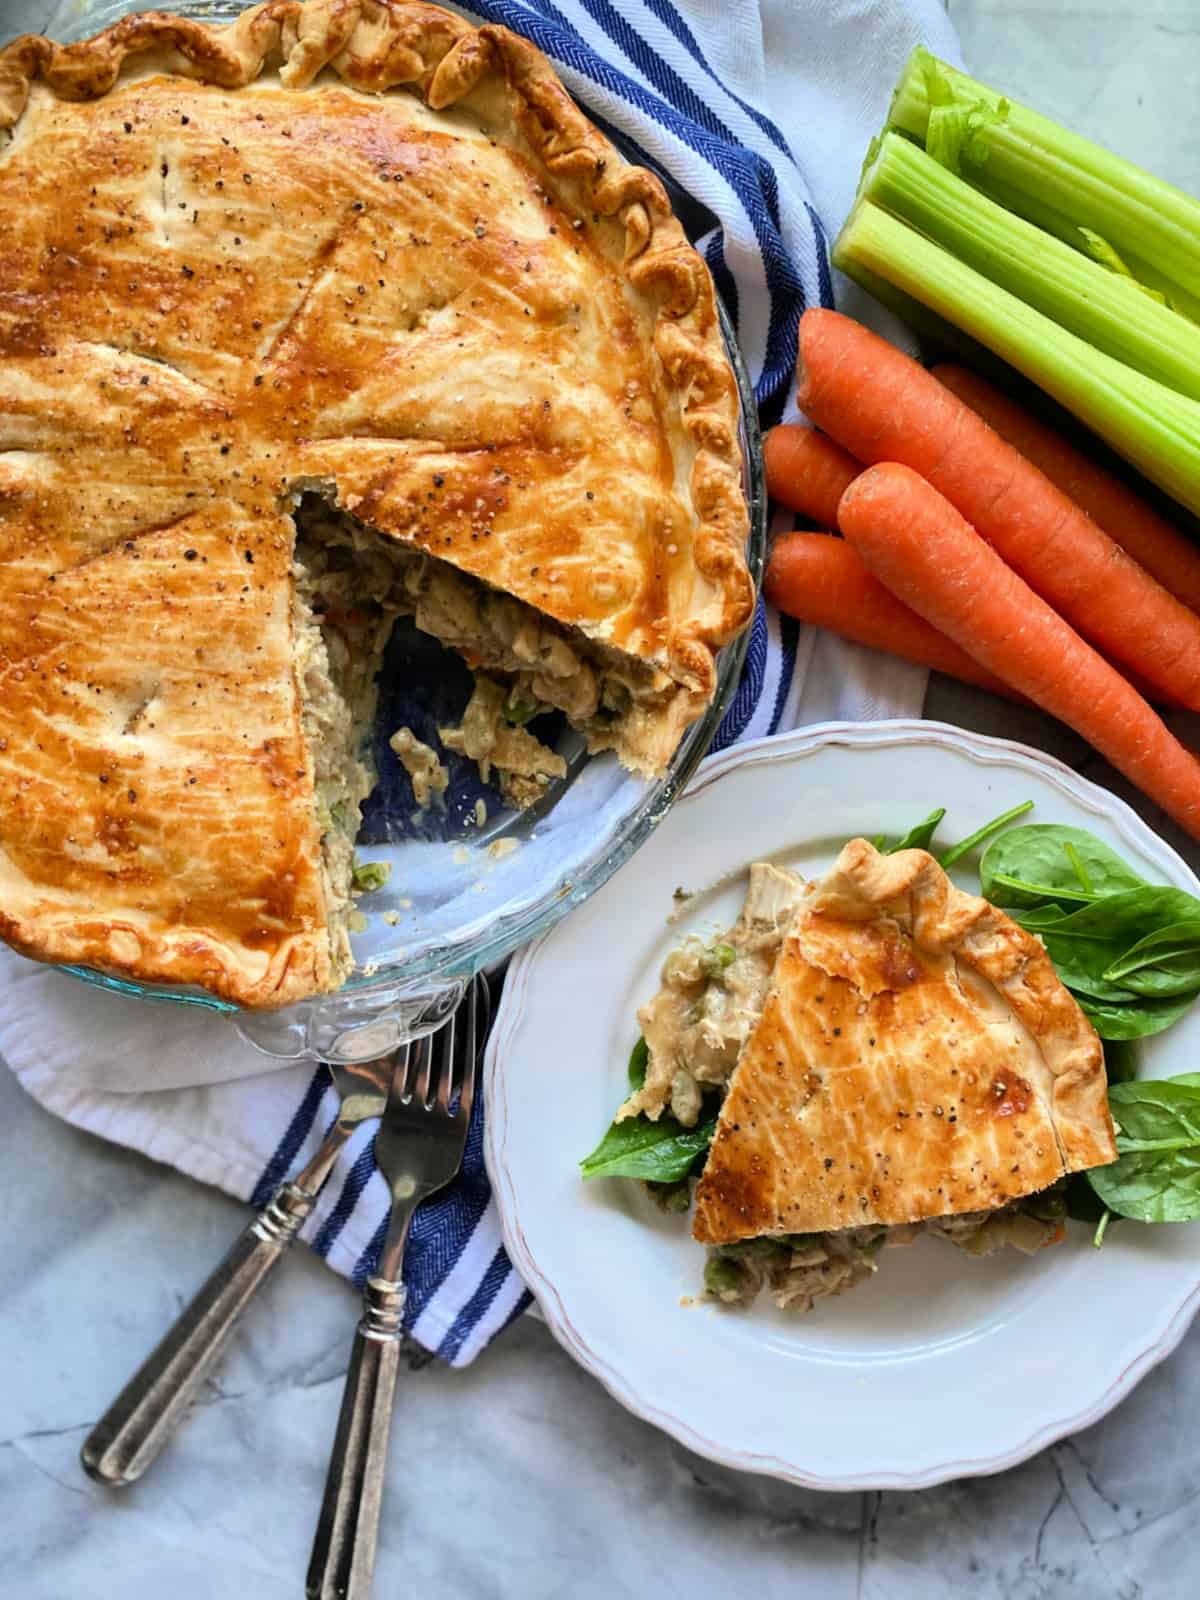
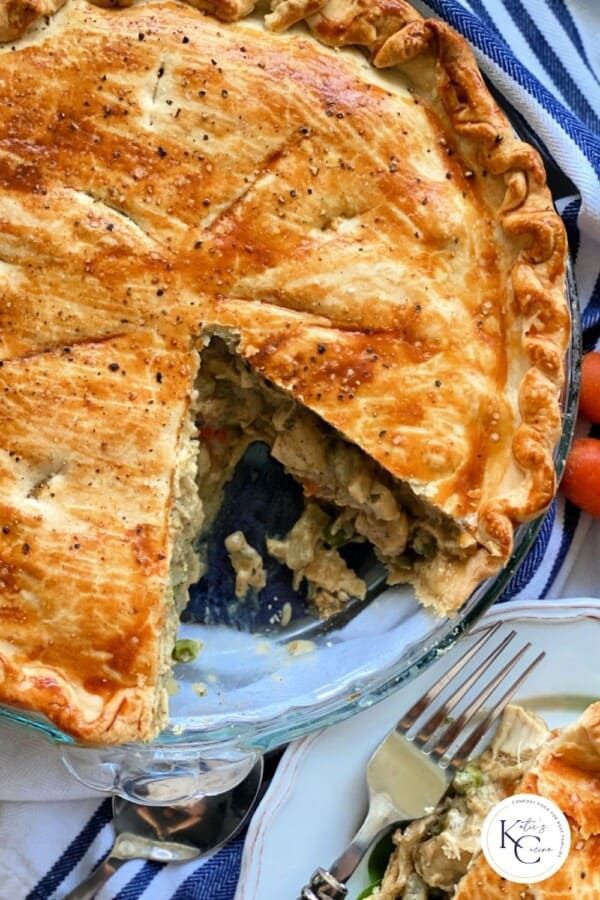
There’s something truly special about a chicken pot pie. Tender chicken, hearty vegetables, and a creamy sauce tucked inside a golden, flaky crust—comfort food at its finest. I didn’t grow up eating it, but my husband did, and he often reminisced about devouring frozen mini pies as a teen. When we moved in together, I started experimenting. At first, I used canned soups, but once I perfected my own homemade cream sauce, I never looked back.
Since then, I’ve created mini pot pies with puff pastry and even a one-pot chicken pot pie pasta. And while it may seem like a time-intensive dish, it doesn’t have to be. With store-bought pie crusts, fresh veggies, pre-cooked chicken (hello leftover roasted chicken or even a $6 Costco rotisserie chicken), and a few pantry staples, this creamy chicken pot pie comes together in under an hour—no canned soups required.
Jump to:
Why this Recipe Works
Homemade Goodness – Frozen pot pies are fine in a pinch, but nothing compares to the flavor of homemade. You’ll taste the difference with every bite.
No Canned Soups – This creamy filling is made from scratch, so you get real, wholesome flavor—no shortcuts, no preservatives, and best of all you know what you are eating!
Quick and Easy – Thanks to store-bought pie crust, this recipe comes together fast. You can even whip it up on a busy evening when comfort food is calling.
Ingredients
- Chicken – The beauty of this recipe is that you can use precooked chicken for the filling. It’s honestly, the only way I make chicken pot pie as it saves so much time. Whether you have leftover roasted chicken, or simply purchased a rotisserie from the grocery store. A few cups of precooked chicken is all you need.
- Vegetables – I like to use a mix of carrots, celery, onion, green peas, and mushrooms in my chicken pot pie filling.
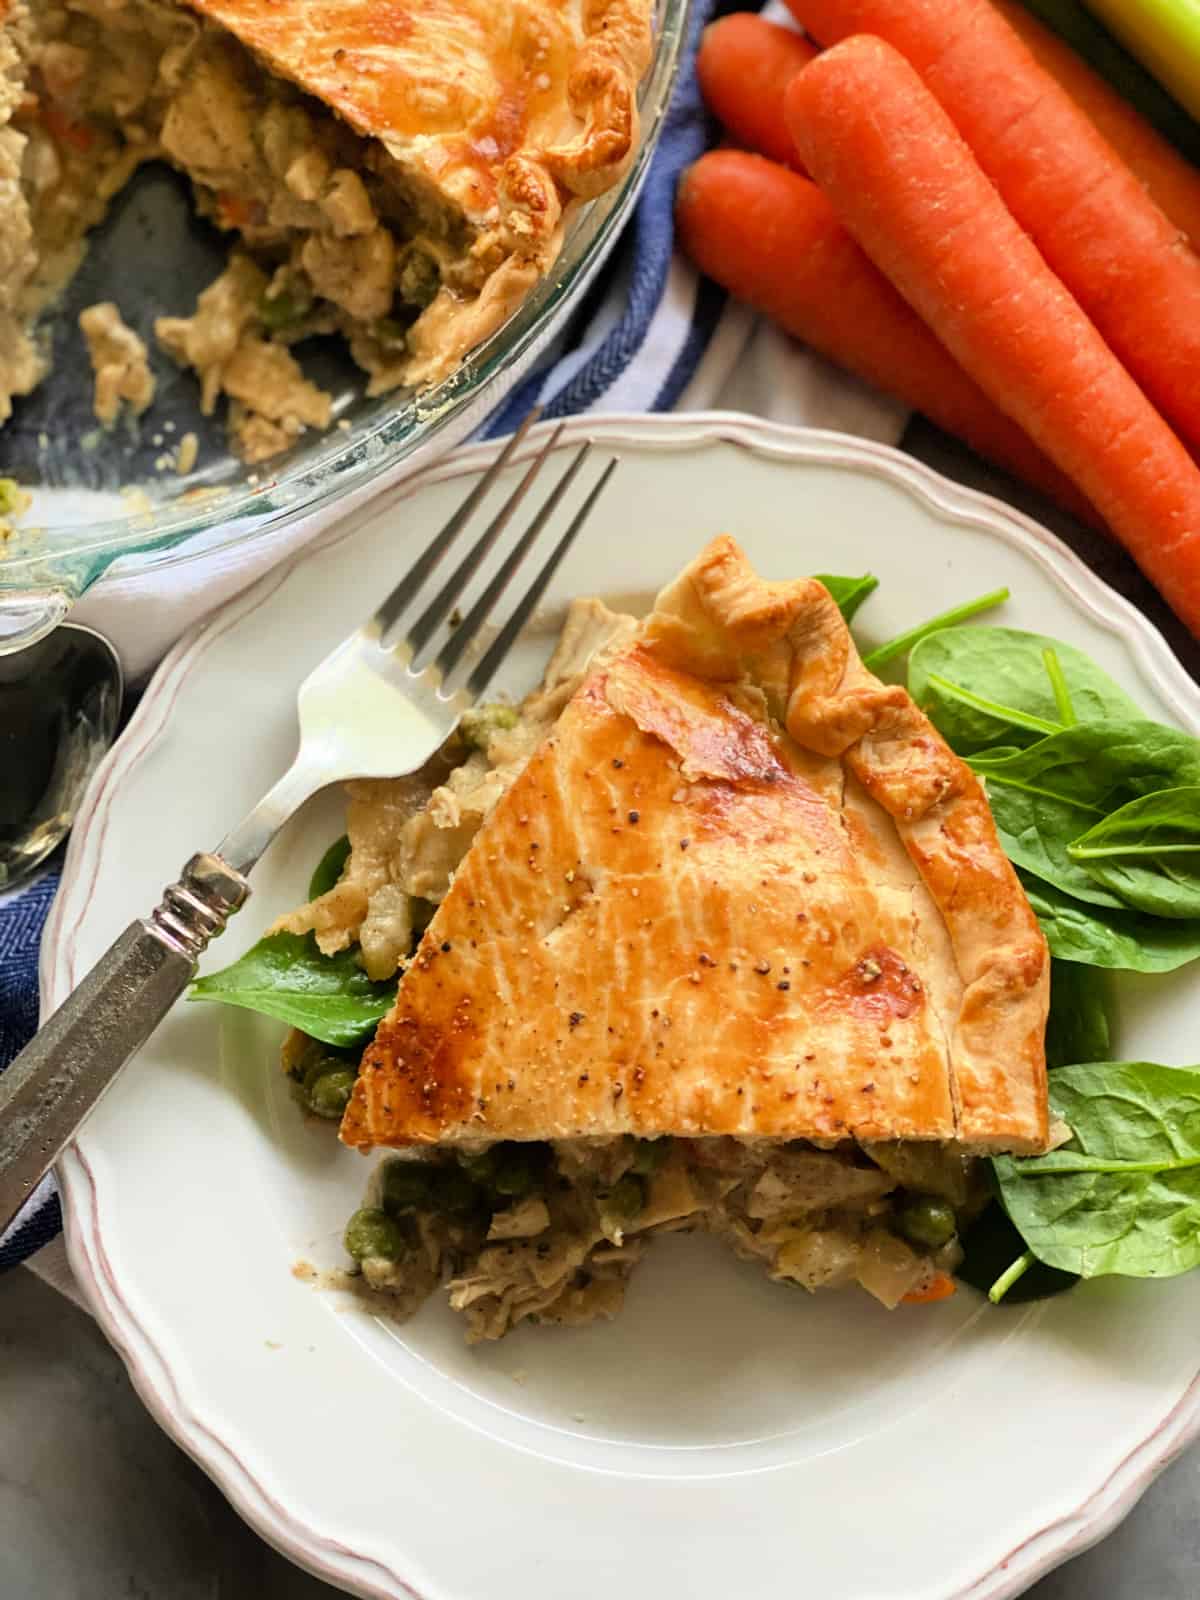
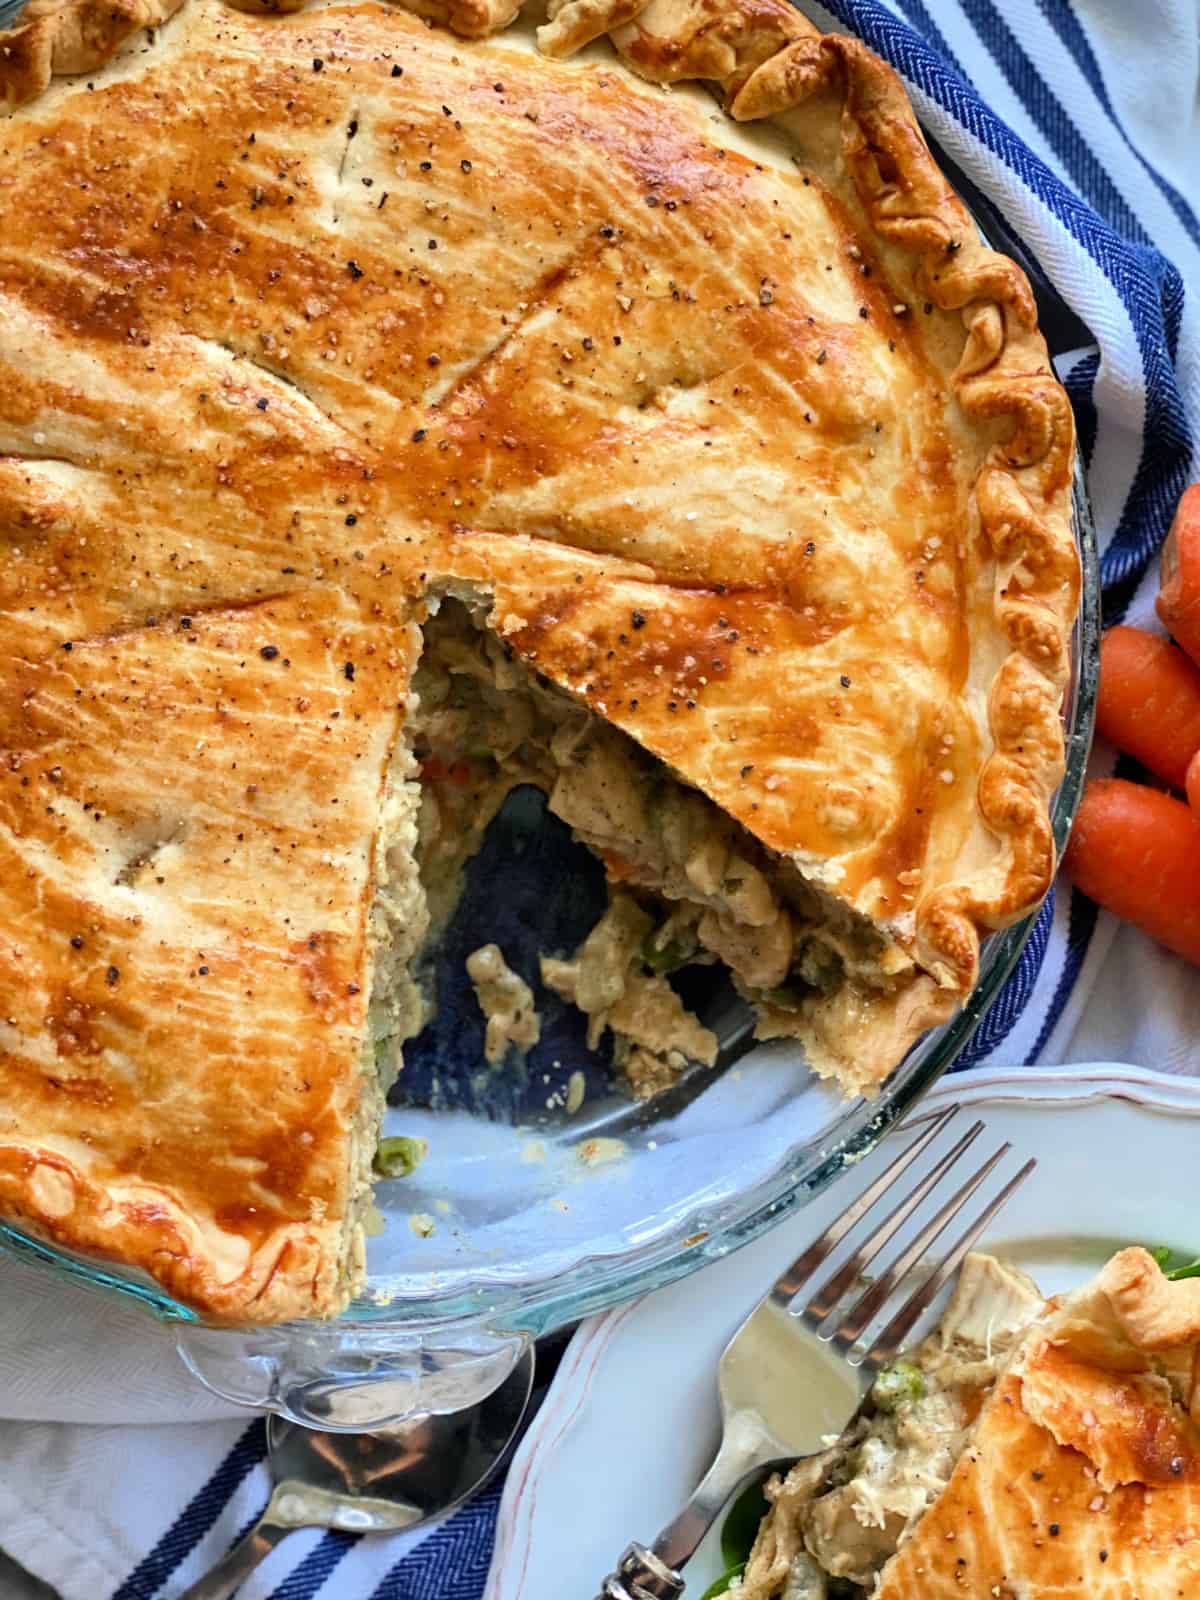
- Seasonings – A mix of salt, pepper, and poultry seasoning flavors the homemade cream sauce balancing out this savory sauce. I also like to sprinkle kosher salt and cracked black pepper on top of the pie crust before baking. It elevates the pie crust.
- Milk – You can use any type of milk for this recipe. I always have 2% on hand so that’s what I use. You can also use half and half or half heavy cream for a richer pot pie (just know the calories will change).
- Broth – I like to use chicken broth to help cook the harder vegetables. This helps boil/steam them and makes them break down faster. No one wants a crunchy carrot in their pie.
- Pie Crust – I always lean toward store bought pie crust. This saves so much time and energy and tastes just as good as the homemade variety. Make sure you bring the pie crust to room temperature prior to rolling out or else it will break and crumble as you roll it out.
- Egg – To achieve the shiny crust you’ll want one egg, mixed well that you will brush on to the top of the pie crust prior to baking.
Step-By-Step Directions
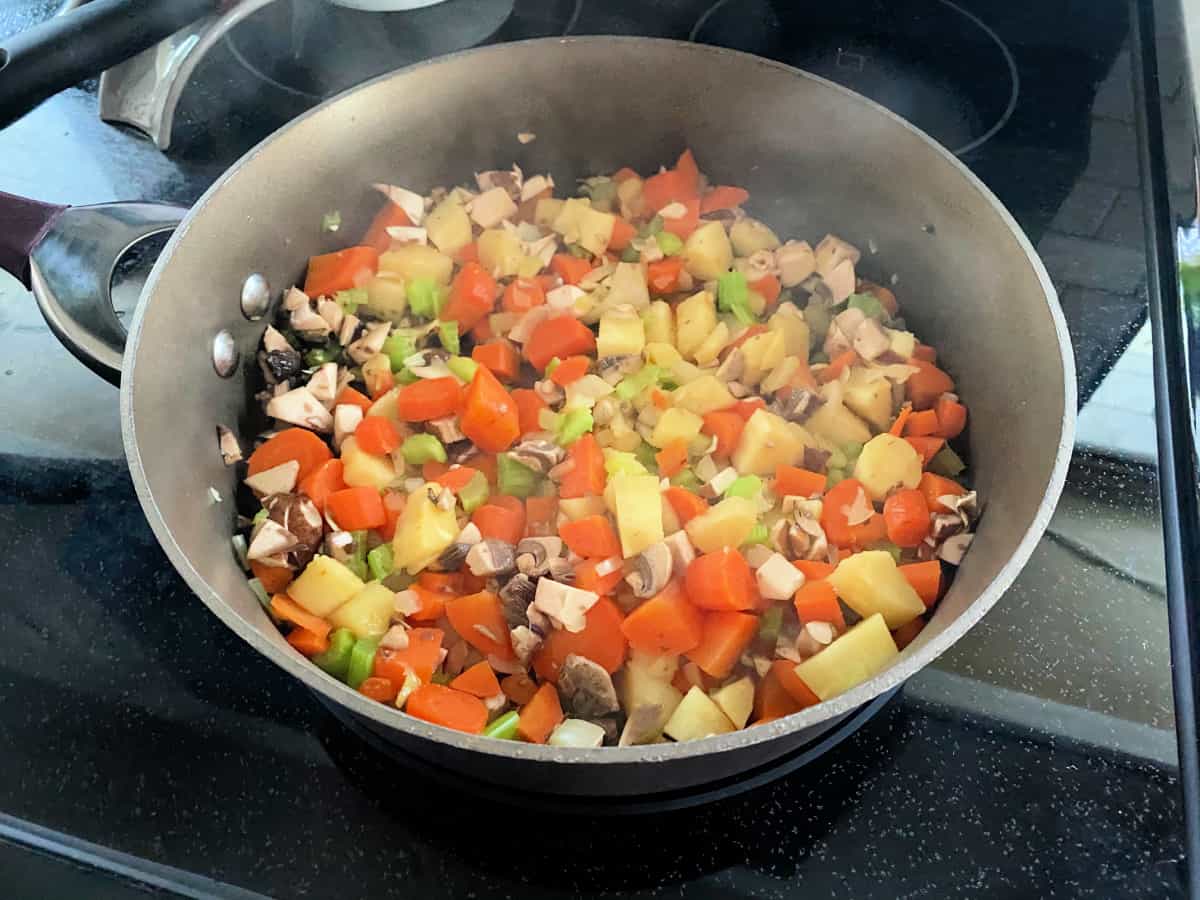
Start by making the filling. In a large skillet, melt the butter over medium-high heat. Add the carrots, celery, and onion, and sauté for 2–3 minutes until they begin to soften. Pour in the chicken broth, cover, and cook for 10 minutes, stirring occasionally.
Next, prepare the crust. Preheat your oven to 400°F so it’s ready to go once the filling is done.
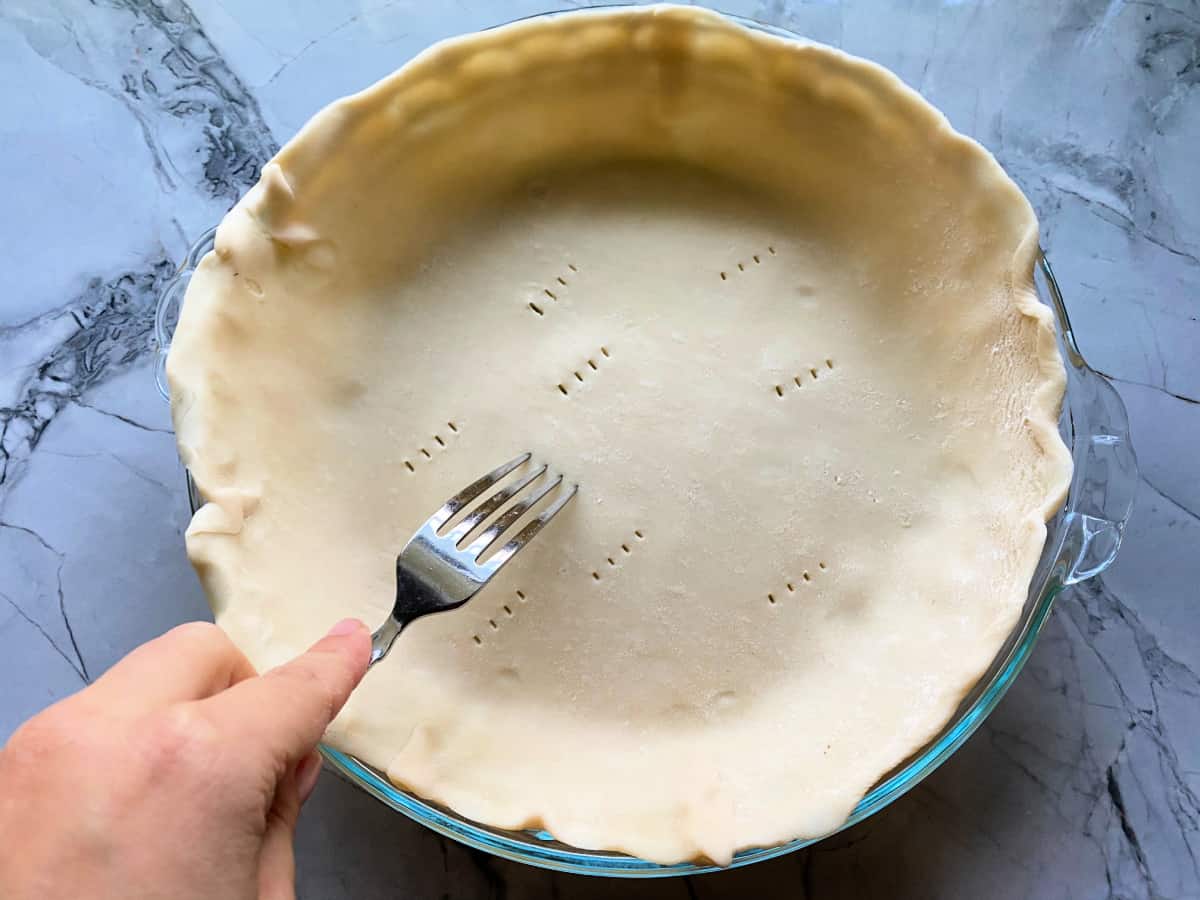
While the vegetables cook, roll out one pie crust and place it in a pie plate. Crimp the edges, then use a fork to prick the bottom. Pre-bake for 15 minutes, just until the crust begins to set.
Once the veggies are partly cooked, stir in the diced mushrooms, peas, poultry seasoning, salt, and pepper. Let simmer for a few minutes to blend the flavors.

While the vegetables cook, whisk the milk and cornstarch together in a small bowl until smooth. Pour the mixture into the skillet, stirring well to combine. Cook over medium heat for about 5 minutes, until the sauce thickens (don’t worry if it looks thin at first—it will thicken as it cooks). Stir in the cooked chicken, mix until evenly coated, then remove from heat and set aside.
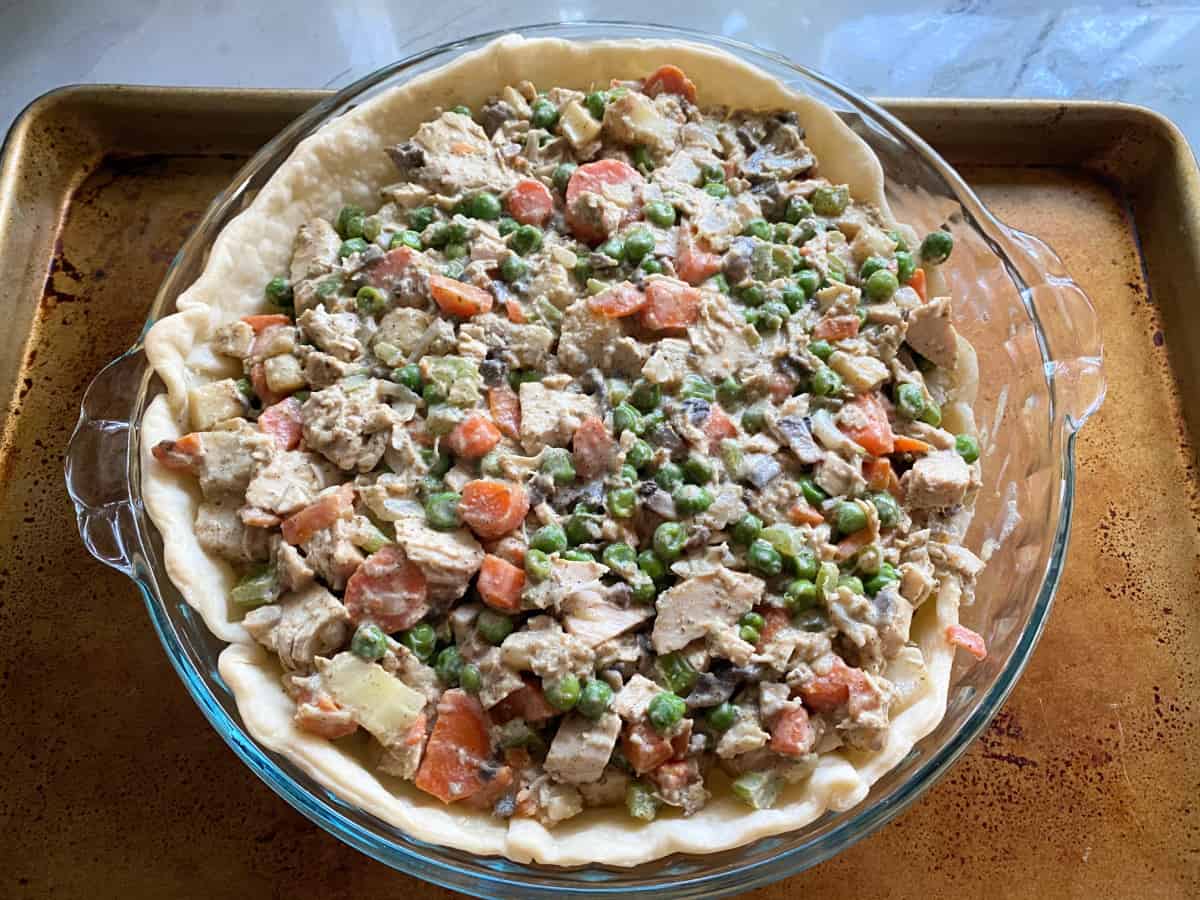
Remove the crust from the oven and carefully spoon the chicken pot pie filling into the pre-baked shell.
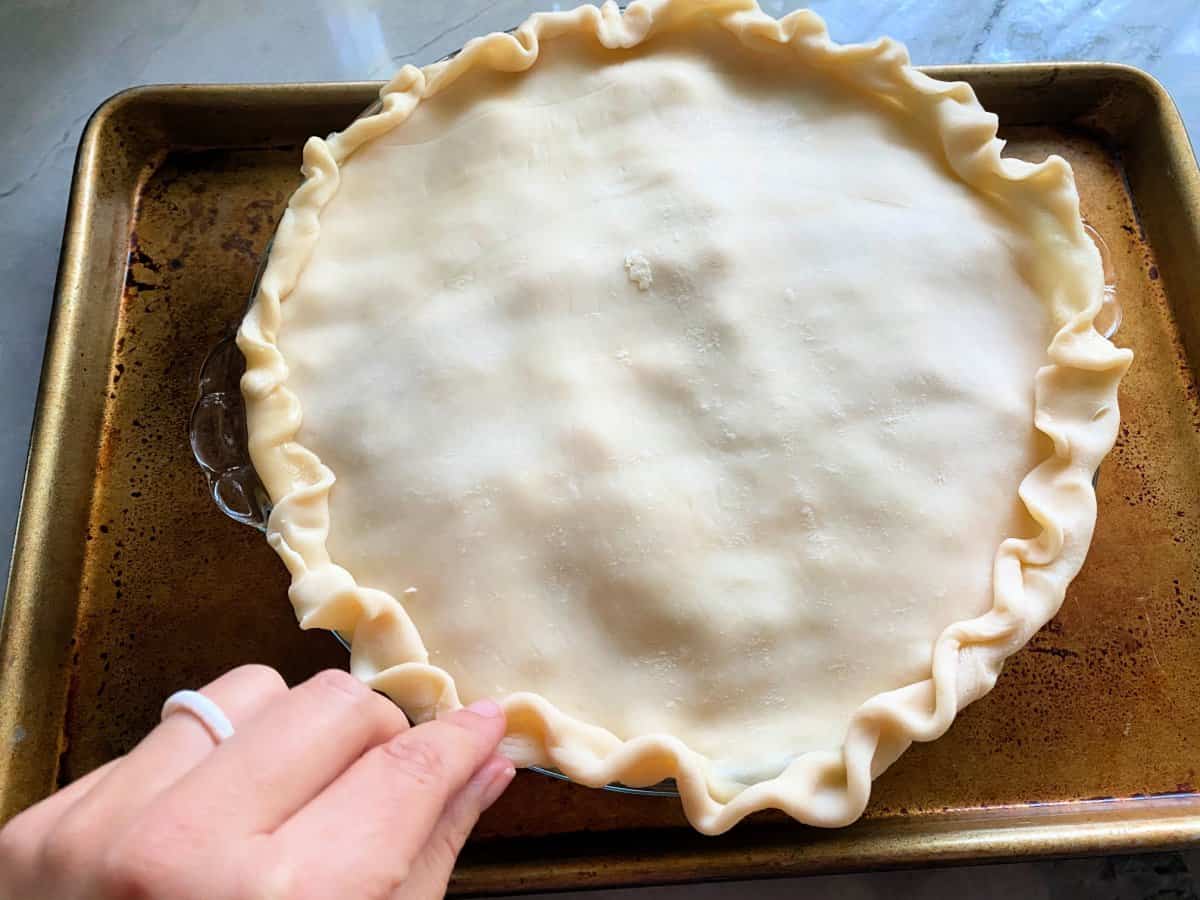
Roll out the second pie crust and place it over the filling. Carefully crimp the edges to seal—remember, the pie plate will be very hot, so take caution when handling.
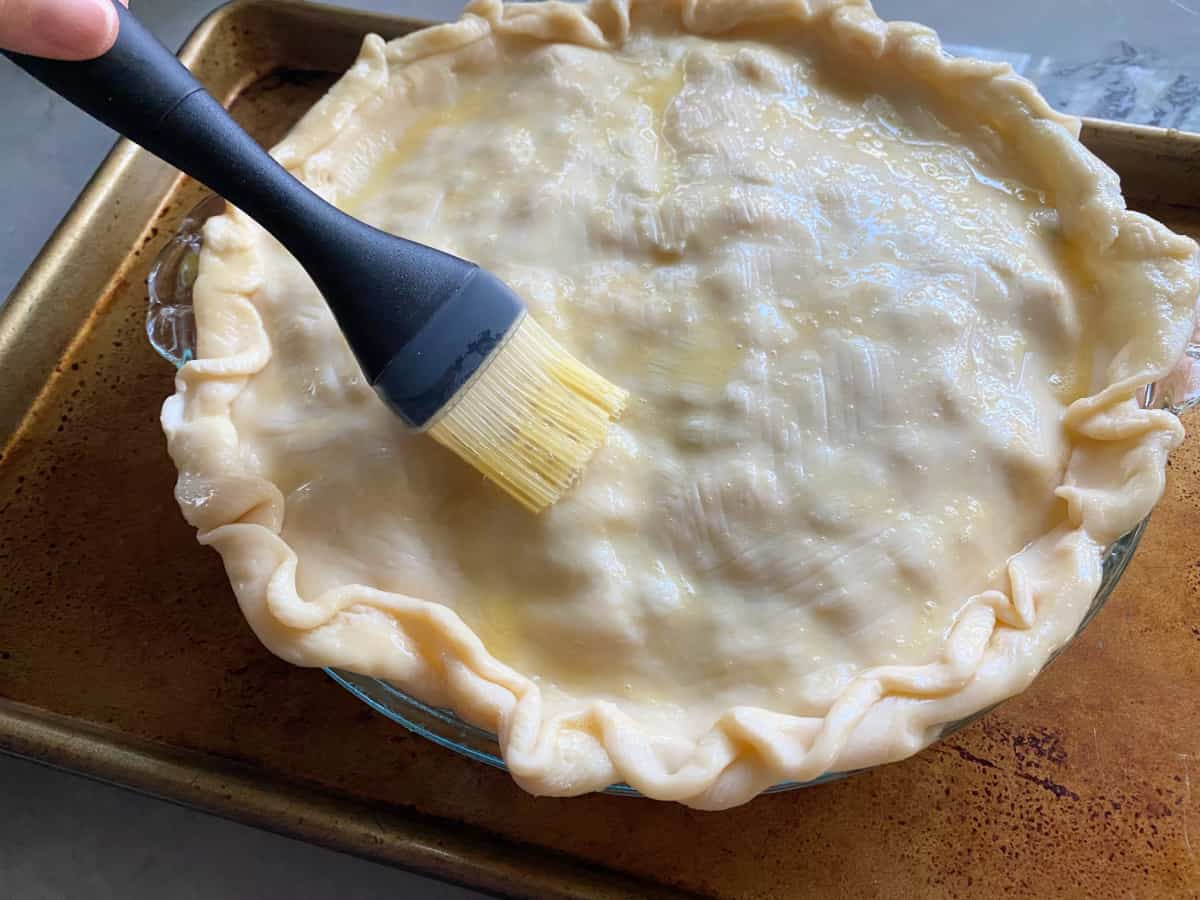
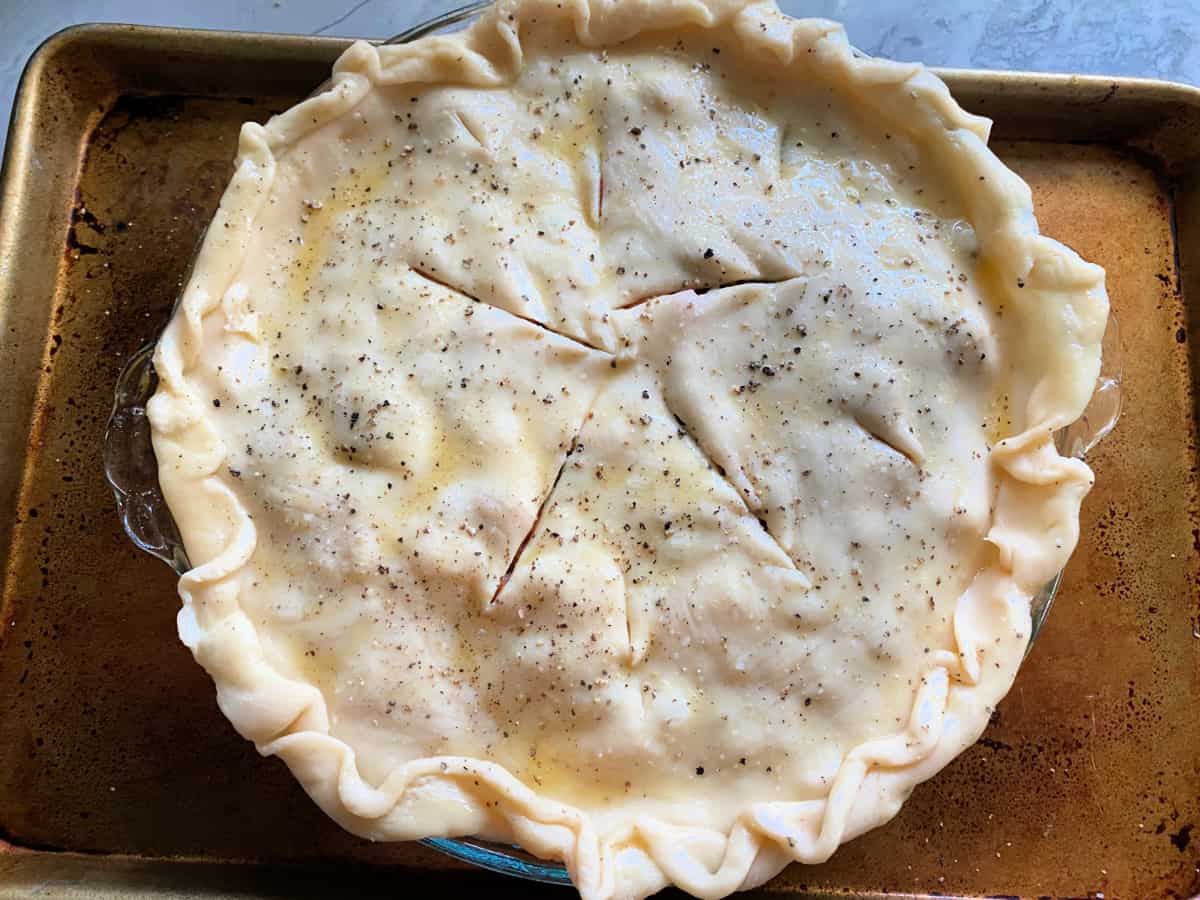
Cut a few small slits in the top crust to allow steam to escape. Brush with a beaten egg, then sprinkle with salt and cracked black pepper.
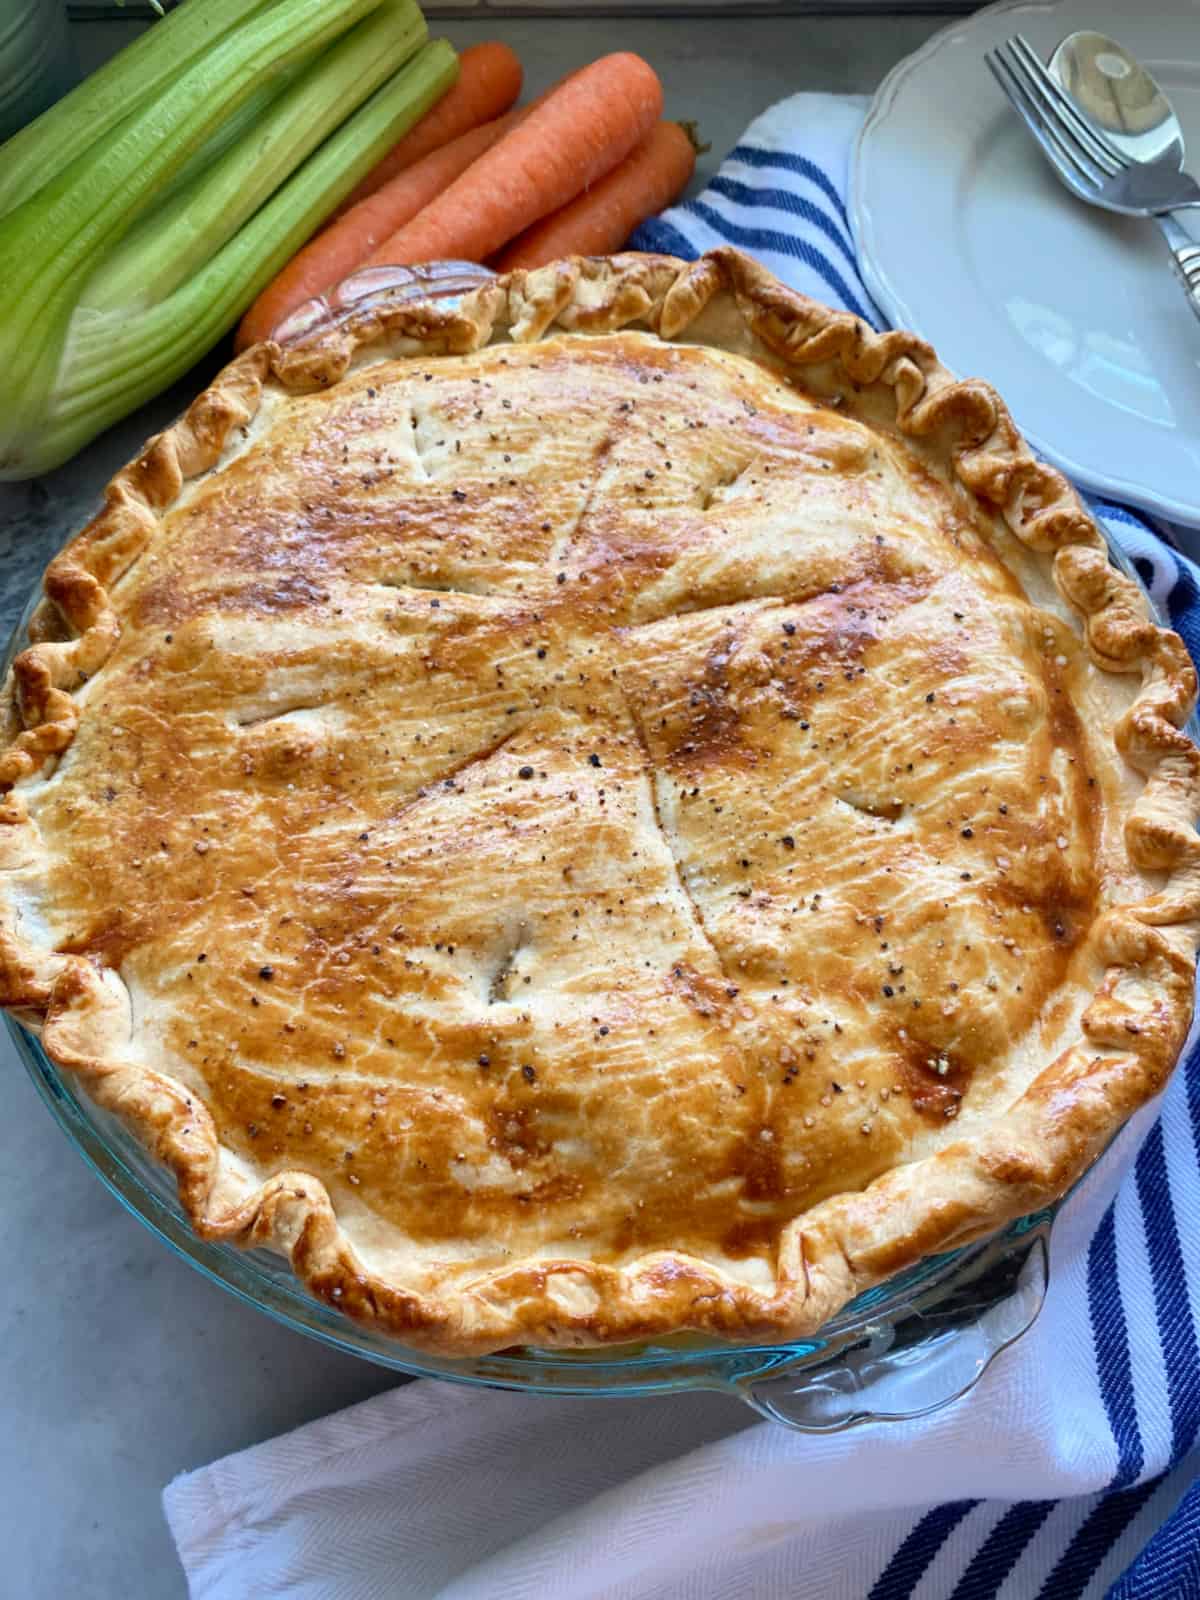
Bake for 30 minutes, just until the crust is golden brown, since the filling is already cooked and warm. Carefully remove from the oven and let the pie rest for 10 minutes before slicing and serving.
Recipe FAQs
Absolutely! In fact, the key to making this recipe go faster is using pre-cooked chicken. So if you plan correctly you can use leftover roasted or rotisserie chicken which will cut about a half hour of your cooking time.
Of course! Feel free to customize your pot pie with your favorite vegetables. Broccoli, mushrooms, and green beans are all great options.
Yes, you can assemble the pie, cover it, and refrigerate it for a few hours or even overnight. I advise you to take it out of the refrigerator a half hour before baking so you can cut the chill from the pie.
Yes! Use less butter or cream, swap in unsweetened almond or cashew milk, and load up on extra veggies like mushrooms. You can also try a whole wheat crust—or even skip the bottom crust and top with phyllo dough for a lighter twist.
Pre-baking (or blind baking) keeps the bottom crust from getting soggy once the filling is added. It creates a sturdier base and ensures that your pie is cooked through.
Not at all! The sauce thickens as it simmers and even more as the pie bakes and cools. Be patient, and you’ll get that creamy consistency.
Resting gives the creamy filling time to set, so your slices hold together instead of spilling out.
Yes, chicken pot pie freezes well. Just be sure to either store it in a freezer proof container or wrap it tightly and store in a Ziplock freezer bag. Make sure to label it with the recipe name and date so you can enjoy it within a few months.
Helpful Tips and Tricks
Here are some of my most helpful tips and tricks when I make my chicken pot pie recipe.
- Save Time – To save time, you can use frozen mixed vegetables, frozen peas and carrots mix, or any other type of frozen veggies.
- Shiny Crust – For an extra glossy crust, you can brush the top with a beaten egg before baking. I always sprinkle salt and cracked black pepper on to the crust before I bake it.
- Edges Browning – If the edges of the crust begin to brown too quickly, cover them with aluminum foil to prevent burning. This is actually something I suggest doing when you pre-bake the crust.
- Rest – Let the pot pie rest for a few minutes after baking to allow the filling to set before slicing.
- Garnish: A sprinkle of fresh herbs or grated cheese on top of your pot pie adds visual appeal and an extra layer of flavor.
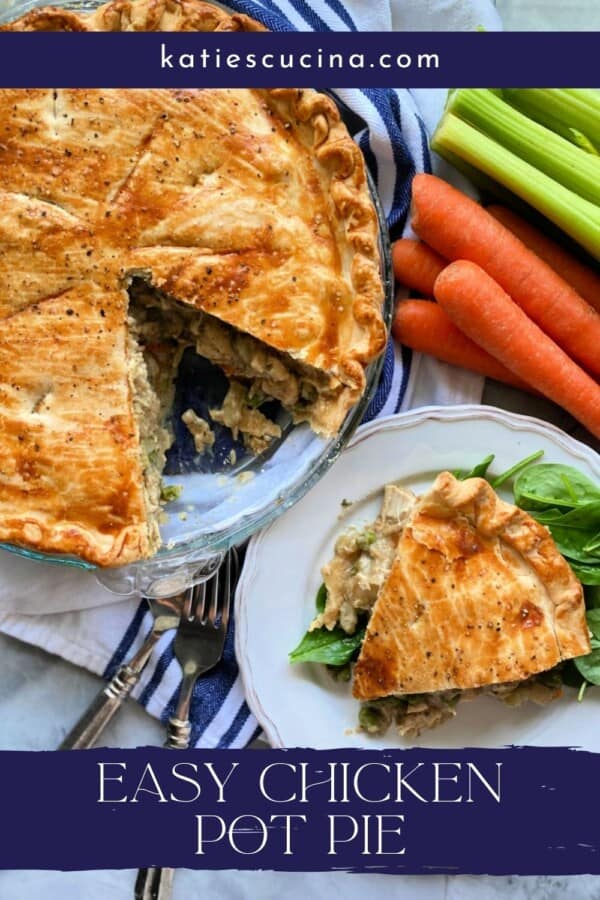
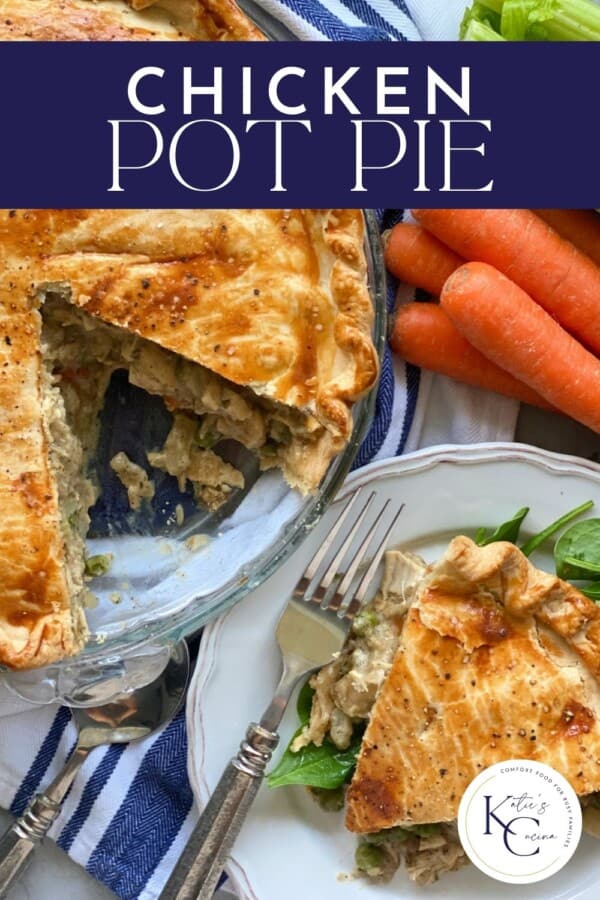
- Serve with Spinach – I always serve chicken pot pie over a bed of spinach. The spinach will wilt and adds an additional layer of flavor and veggies to the dinner.
- Individual Portions: For a more elegant presentation, consider making mini chicken pot pies or serving the dish in individual ramekins.
- Refrigerated Pie Crust – When you are ready to start making this recipe make sure to bring your pie crust out of the refrigerator and let sit at room temperature for at least 15 minutes. It will be much easier to handle.
- Vegetables – Want to add more vegetables to your pot pie? Try adding 2-4 parsnips, 1-2 peeled and diced white potatoes, sweet potatoes, green beans, and/or corn kernels.
- Crust – Instead of pie crust you can use raw biscuits on top or even puff pastry. If you use one of these options you’ll just omit the pre-baking of pie crust step as you won’t have pie crust on the bottom. Baking time might be a little less depending on what you decide to use.
- Canned Soups – When I first started making this recipe I would use 1 can of cream of chicken and 1 can of cream of mushroom soups instead of making a homemade creamy sauce. If you want to use canned soups instead simply replace the canned soups during the step when you mix the milk and cornstarch together. Pour the soups into the cooked veggie mixture instead.
This Chicken Pot Pie recipe is a comforting, homemade classic that’s sure to become a staple in your kitchen. It’s easy to make, full of flavor, and perfect for sharing with loved ones. Enjoy!
If you make this chicken pot pie recipe, I would be honored and love for you to take the time to leave a ⭐ star rating and comment! I spend hours developing and testing these recipes, and always love to hear feedback and user experience!
Don’t forget to FOLLOW ME on Facebook, Pinterest, and Instagram, and subscribe to my email list!

Creamy Chicken Pot Pie
Equipment
- Measuring Spoons
- Stove Top
- Knife
- Cutting Board
- Pie Plate
- Oven
Ingredients
- 2 Refrigerated Pie Crust room temperature
- 3 tablespoons butter melted
- 4 Carrots peeled and diced
- 4 Celery Stalks diced
- 1 Onion diced
- 1 cup Chicken Broth
- 1 cup Mushrooms diced
- 1 cup Frozen Green Peas
- 1 tablespoon Poultry seasoning dried thyme, and parsley
- ½ teaspoon Salt
- ¼ teaspoon Black pepper
- 1½ cups Milk
- 1 tablespoon Cornstarch
- 3 cups Cooked Chicken shredded or chopped into bite size pieces
- 1 Egg
- Salt and cracked black pepper for topping on pie crust
Instructions
- Preheat oven to 400 degrees Fahrenheit.
- In a large skillet melt the butter on medium-high heat. Add in the carrots, celery, and onion, stirring and cooking for 2-3 minutes. Then, mix well and add in the chicken broth. Cook on medium-high heat with lid on for 10 minutes, Stirring occasionally.
- While the vegetables cook, roll out one of the pie crust. Place over the top of a pie plate and crimp edges. Poke the bottom of the pie crust with the tines of a fork. Pre-bake crust for 15 minutes until the crust starts to harden and set.
- Once the veggies are semi-cooked add the diced mushrooms, green peas, 1 tablespoon poultry seasoning, ½ teaspoon salt and ¼ teaspoon black pepper. Mix well and let simmer for a few minutes.
- While vegetables continue to cook, using a small bowl, combine the milk and cornstarch until well blended. Pour the mix into the pot and mix until well incorporated. Cook on medium heat for 5 minutes until the mixture thickens (the sauce will begin to thicken over time). Add the cooked diced/shredded chicken, mix well, and then remove from heat and set to the side.
- Remove the semi-cooked pie crust from oven. Carefully, pour the chicken pot pie filling into the pre-baked crust.
- Roll out the second pie crust. Place on top of the pot pie. Carefully crimp edges to secure pie crust (remember pie plate is very hot, so be very careful with this step). Cut a few slits in the top of the pie crust. Brush the top of the pie crust with a beaten egg and sprinkle salt and cracked black pepper on top.
- Bake for 30 minutes until pie crust is golden brown. Carefully remove from the oven and let sit for 10 minutes. Slice and serve immediately.
Notes
- Refrigerated Pie Crust – When you are ready to start making this recipe make sure to bring your pie crust out of the refrigerator and let sit at room temperature for at least 15 minutes. It will be much easier to handle.
- Vegetables – Want to add more vegetables to your pot pie? Try adding 2-4 parsnips, 1-2 peeled and diced white potatoes, sweet potatoes, green beans, and/or corn kernels.
- Crust – Instead of pie crust you can use raw biscuits on top or even puff pastry. If you use one of these options you’ll just omit the pre-baking of pie crust step as you won’t have pie crust on the bottom. Baking time might be a little less depending on what you decide to use.
Railbabe says
My husband loves pot pies, so with a bunch of shredded chicken in the freezer, I decided to find an easy recipe without soup. While I had to make a very few tweaks, I have gladly added this to my repertoire of delicious things my husband favors. I used my deep dish pie plate, and the filling completely filled it and served better than it would have in a shallower pie plate. The main change I made was the crust timing. I actually use store bought crusts when I’m pinched for time, but I always flour the counter and pin and roll it out so it’s thinner, more delicate and has more to edge and keep filling from boiling over the edge into the oven. I put the bottom crust into the oven first, and let it bake as I was chopping and preparing the inerds. I was still cooking/prepping when the bottom crust was ready, and set it aside on a cooling rack. By the time it was ready for the top crust to be added, there was no way to burn my fingers. Instead of a pinched edge, I still built them up, but used a fork around the edges so it looked like a store pot pie…but it was much much better! Thanks Katie!
Katie says
So happy you enjoyed this recipe, and thank you for the pie crust tips!